Projects / Cyberdeck · In progress
Printdeck
A Raspberry Pi 5 desk slab that runs Klipper and OctoPrint for your 3D printer and plays Spotify through real speakers.
- Size
- 132 × 221 × 35 mm
- Printed parts
- 4 · 274 g
- Filament cost
- About $6
- Skill
- Intermediate
Overview
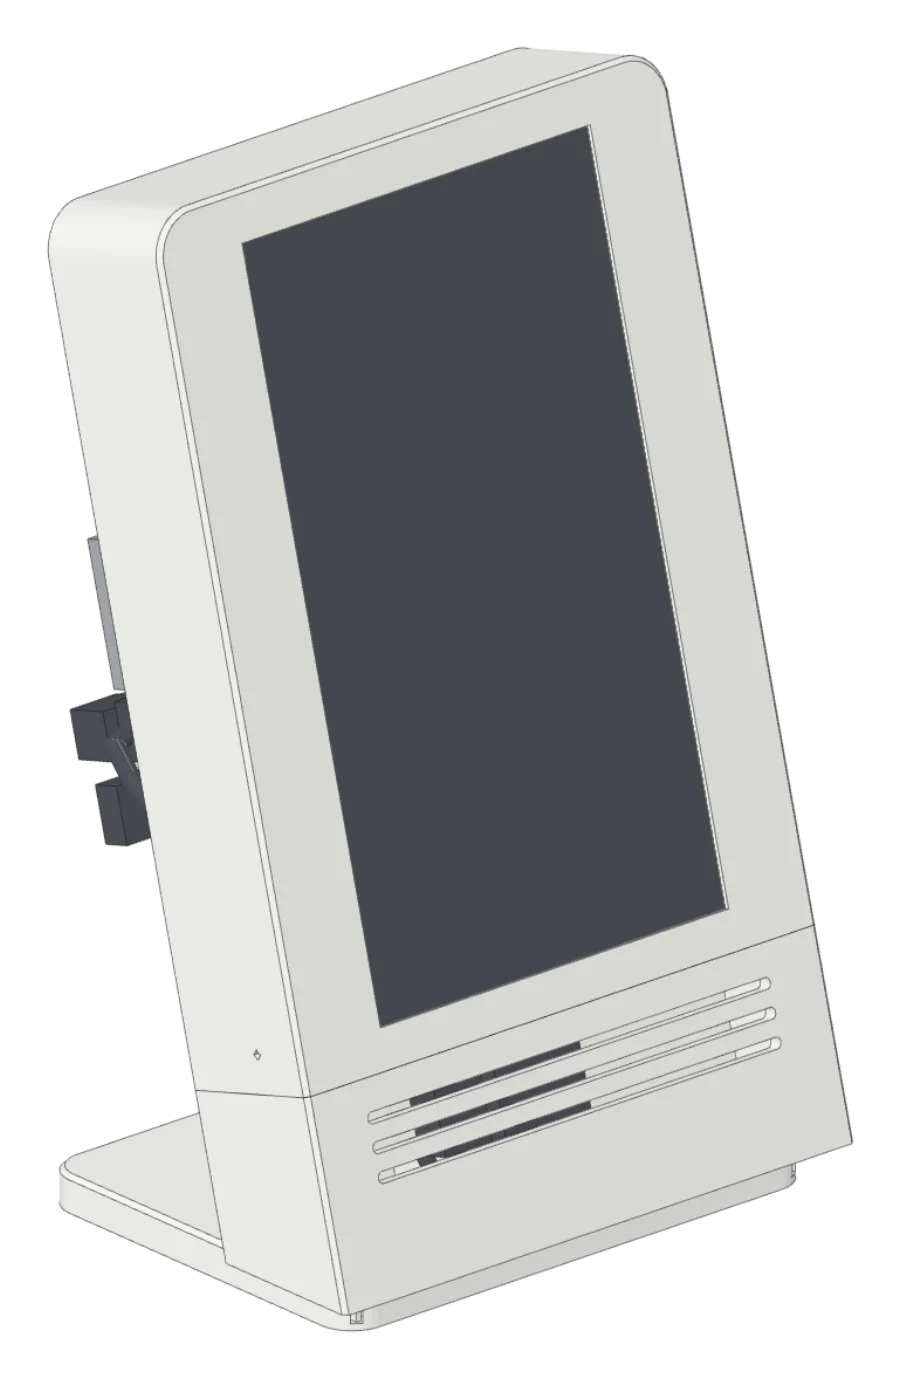
Printdeck started as Speakerdeck, a small Spotify player. It now does more work as a print server: it sits next to the 3D printer, runs Klipper and OctoPrint, and plays music while the printer runs.
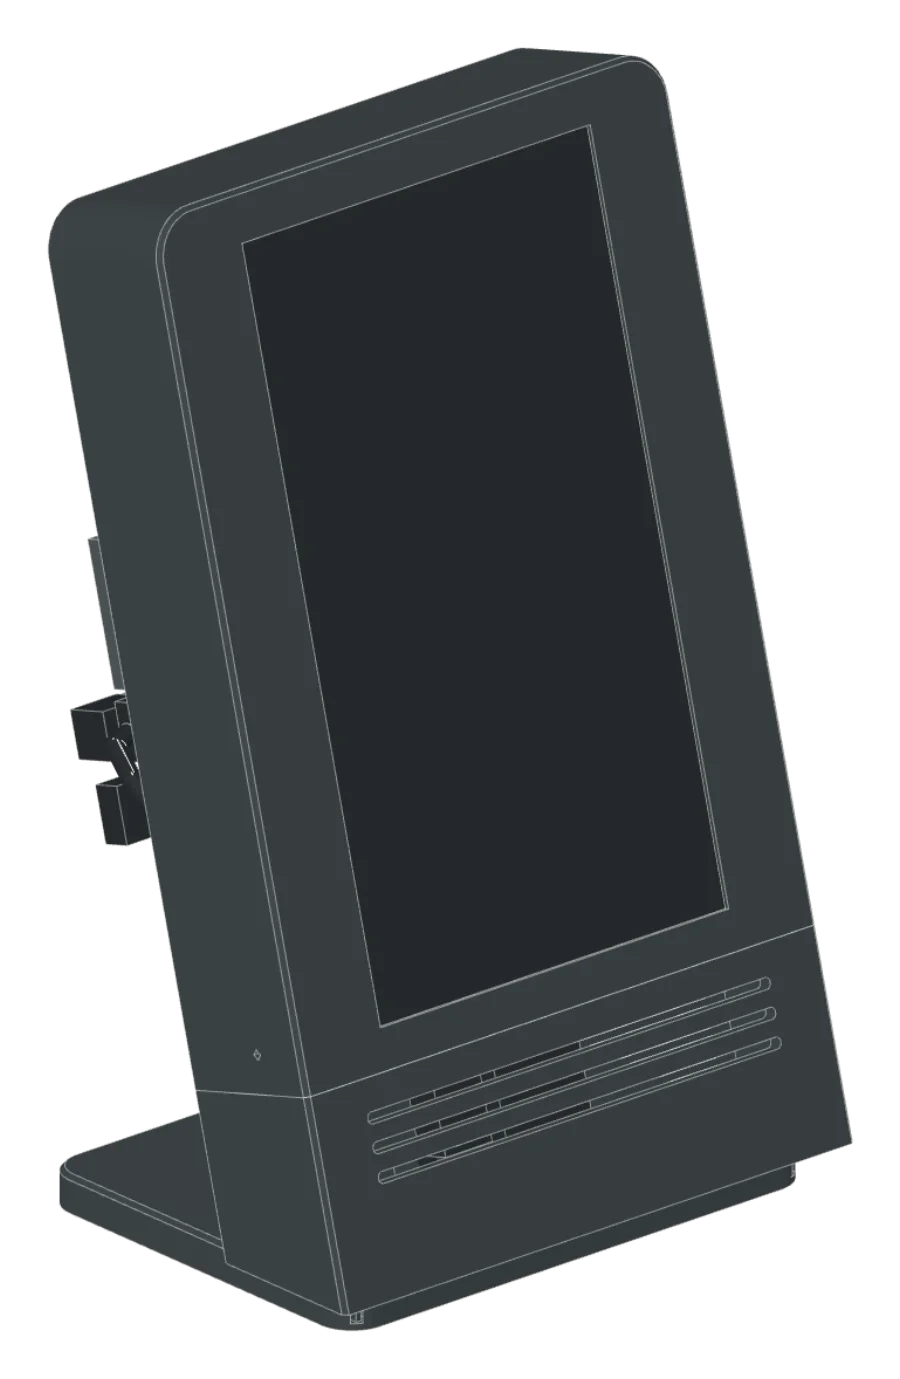
The case is a navy slab that leans back 15° on a gray foot. The slab holds only the display and the drive. The Pi 5 and the Amp2 mount on the outside of the orange back plate, so every port is open and every plug goes straight in.
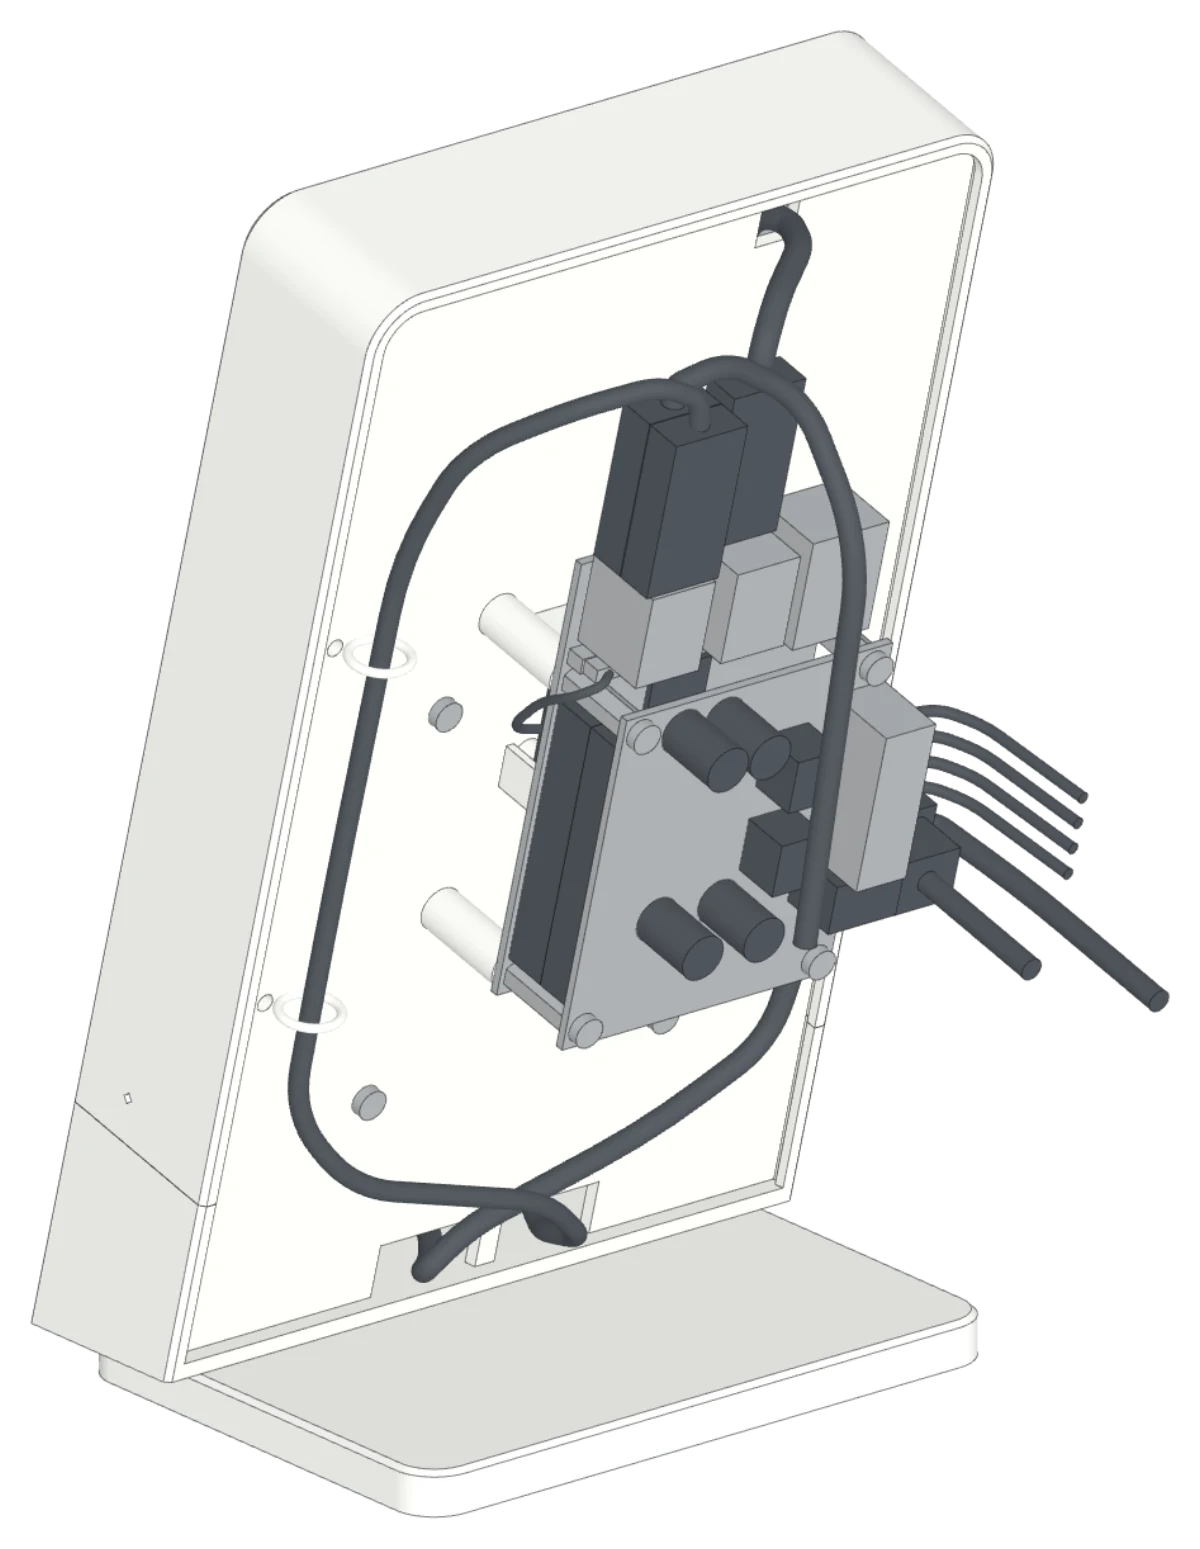
No cable shows on the front or the sides. The display cables run inside the chin, out through notches in the back plate, and up the rear, held by three twist ties.
The case snaps together. Screws hold only the display, the drive, and the Pi. A fit check in the CAD tests every pair of parts, and every part prints with no supports.
What you need
| Part | Qty | Type | Get it |
|---|---|---|---|
| Slab Navy PLA, front face down, 81 g | 1 | Download | |
| Chin Orange PLA, front face down, 44 g | 1 | Download | |
| Back plate Orange PLA, drive side down, 89 g | 1 | Download | |
| Foot Gray PLA, flat, hooks up, 60 g | 1 | Download | |
| Raspberry Pi 5 With a heatsink, max. 16 × 16 × 8 mm | 1 | Buy | Raspberry Pi ↗ |
| HiFiBerry Amp2 Stacks on the Pi with four M3 × 16 male-female standoffs | 1 | Buy | HiFiBerry ↗ |
| Adafruit 7" HDMI display with touch 800 × 480, USB touch controller | 1 | Buy | Adafruit ↗ |
| 2.5" SATA SSD with a USB adapter board Boot drive | 1 | Buy | Amazon search ↗ |
| 30 mm fan, 10 mm thick, Pi 5 fan plug | 1 | Buy | Amazon search ↗ |
| HDMI ribbon cable kit HDMI A plug, micro HDMI plug, flat ribbon 40–50 cm. A round cable cannot bend under the display. | 1 | Buy | Amazon search ↗ |
| USB-A to micro USB cable, thin Max. 3.5 mm thick, 50–60 cm, straight plugs | 1 | Buy | Amazon search ↗ |
| USB 3 micro-B to USB-A cable 15–20 cm, straight micro-B plug | 1 | Buy | Amazon search ↗ |
| Raspberry Pi 27 W USB-C power supply | 1 | Buy | Raspberry Pi ↗ |
| 12–20 V supply for the Amp2 Right-angle 5.5 × 2.1 mm plug | 1 | Buy | Amazon search ↗ |
| Passive bookshelf speakers I use Denon SC-N10 | 1 pair | Buy | Amazon search ↗ |
| M3 heat-set inserts 4 × 4 mm long (display), 4 × max. 5.5 mm (Pi) | 8 | Hardware | |
| M3 screws 4 × M3×6 (display), 4 × M3×5 (drive), 4 × M3×16 pan head (fan) | 12 | Hardware | |
| Twist ties, 15 cm Max. 3 mm wide. Orange looks best. | 3 | Hardware |
Tools
- 3D printer — Bed at least 135 × 210 mm. Profiles target a LulzBot TAZ Workhorse, 0.5 mm nozzle.
- Soldering iron at 220 °C — For the heat-set inserts
- Small Phillips and hex drivers
- A paper clip — To release the chin tongues later
Print settings
- Material
- PLA in navy, orange, and gray
- Layer height
- 0.3 mm
- Infill
- 20 % grid (slab, chin, foot), 40 % (back plate)
- Walls
- 1.5 mm walls, 1.2 mm top and bottom
- Supports
- Off. Every hook and slot has 45° faces.
- Fit
- Snap joints have 0.3 mm clearance. Print the chin first and test it on the slab.
The software
The screen runs deck, a touch app in Go. It draws straight to the 7-inch display, with no desktop and no browser. It has two tabs.
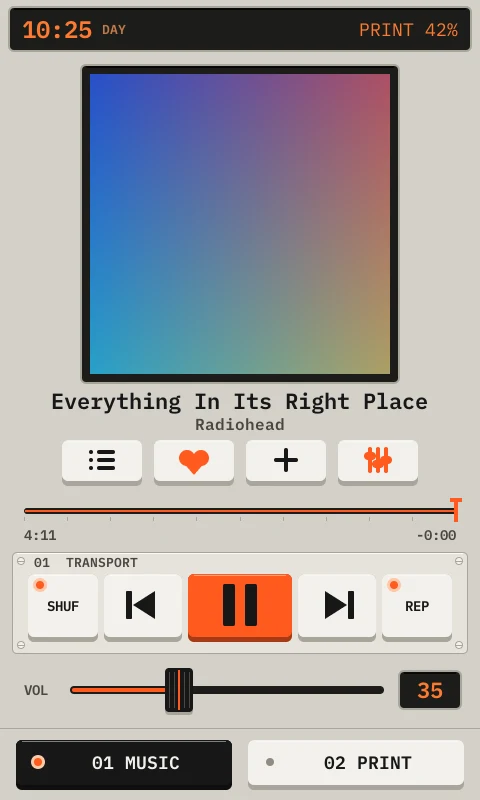
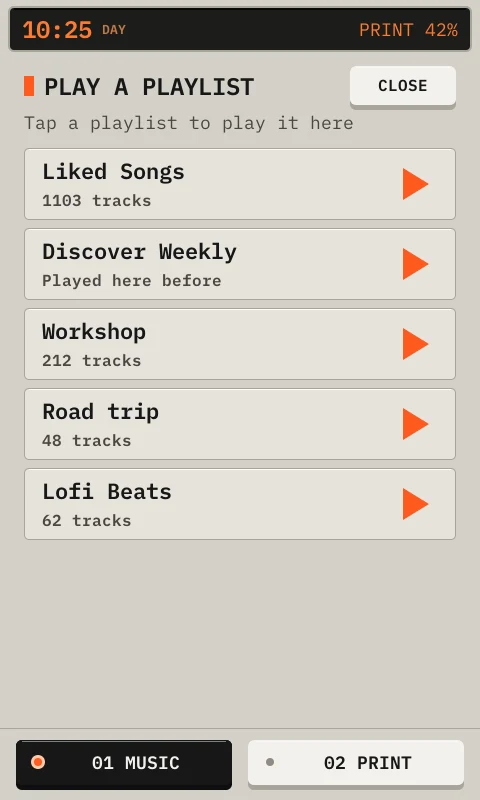
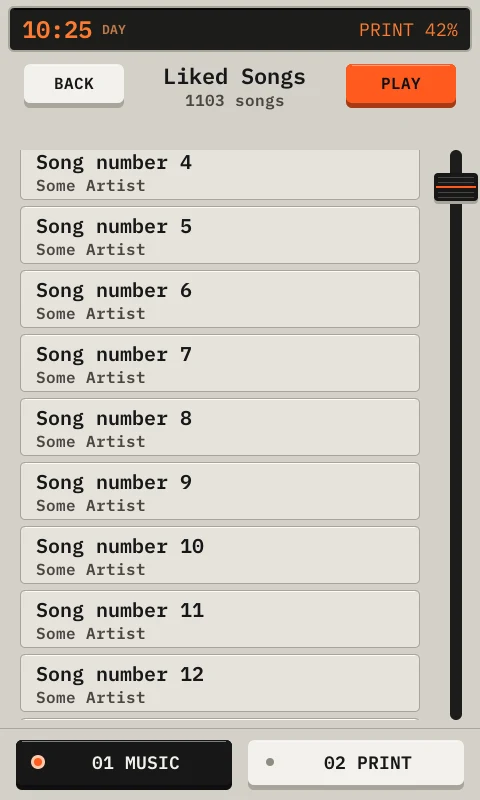
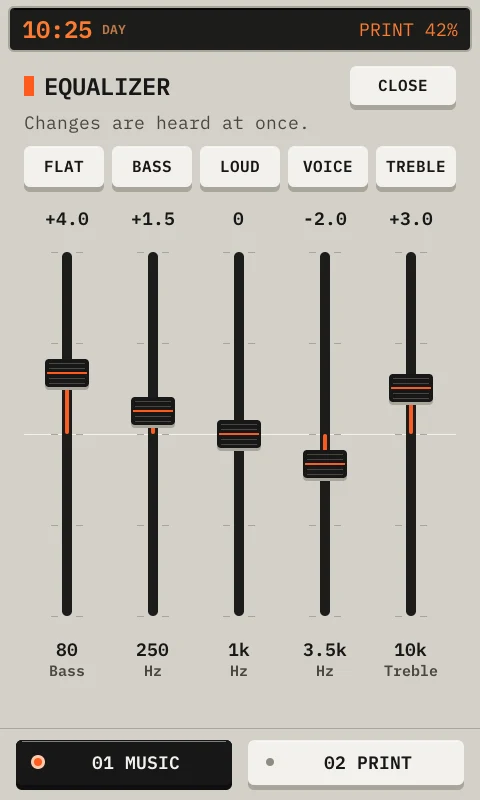
Music follows and controls Spotify: cover, seek, play, skip, shuffle, and repeat. It has a five-band equalizer from 80 Hz to 10 kHz, and buttons for Liked Songs and your playlists. The volume slider and the Spotify app set the same amp volume.
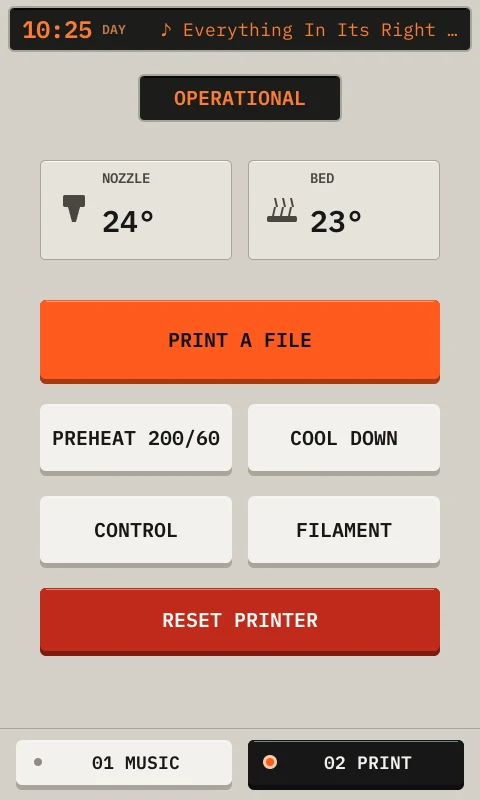
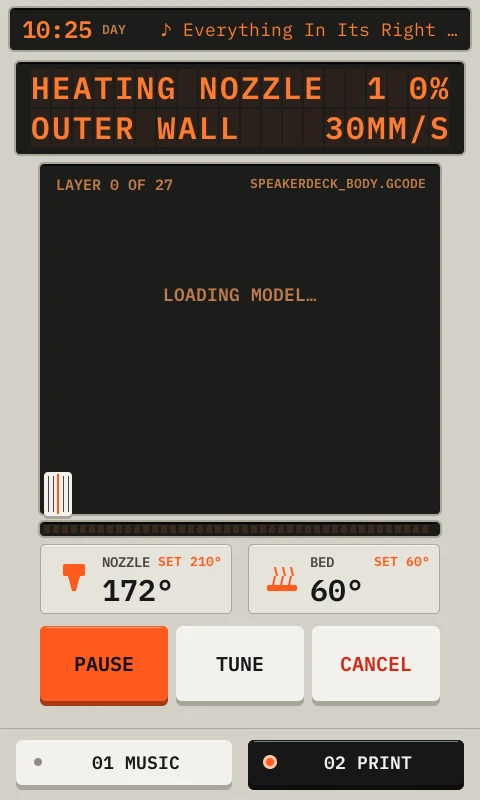
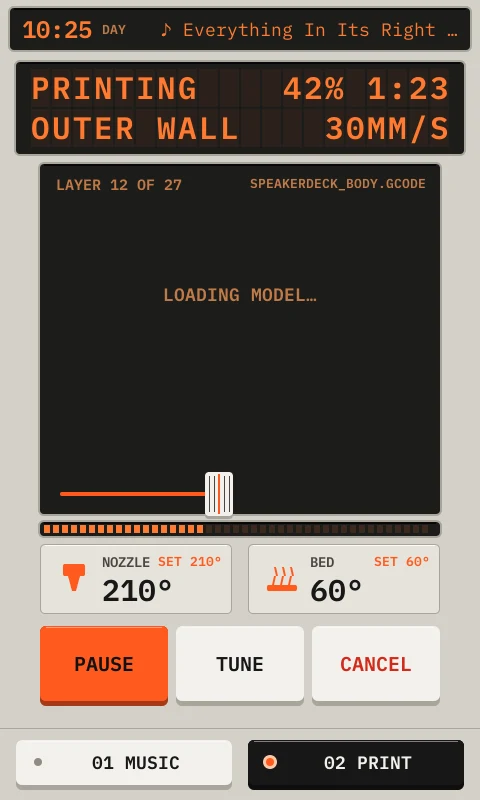
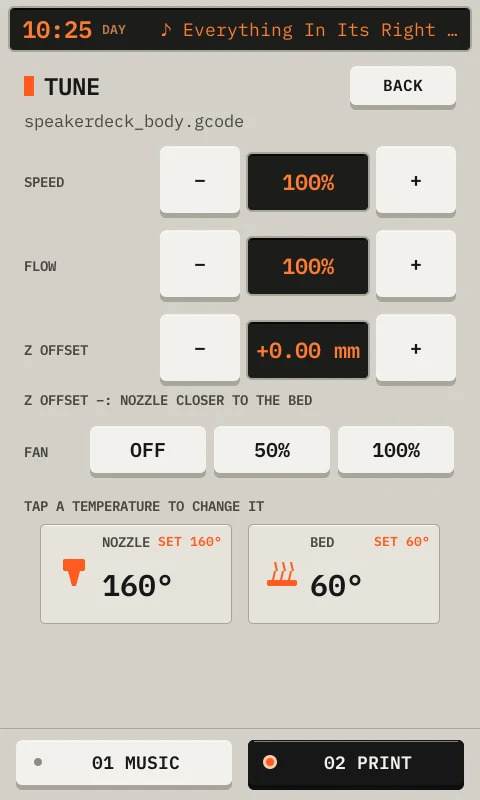
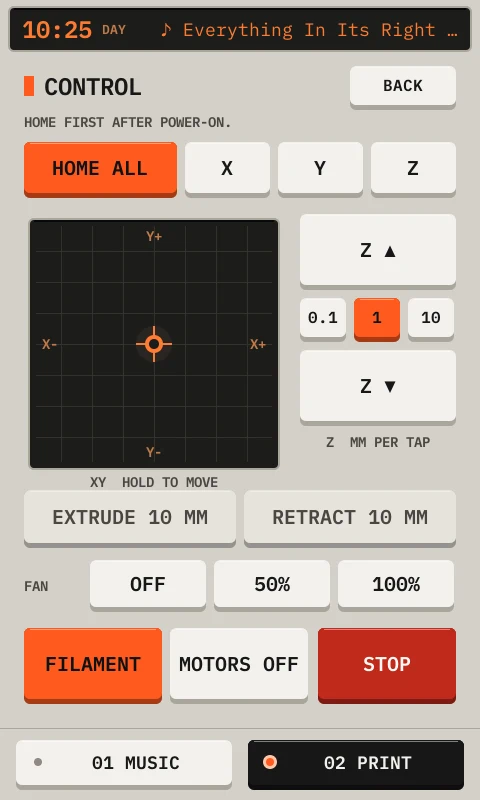
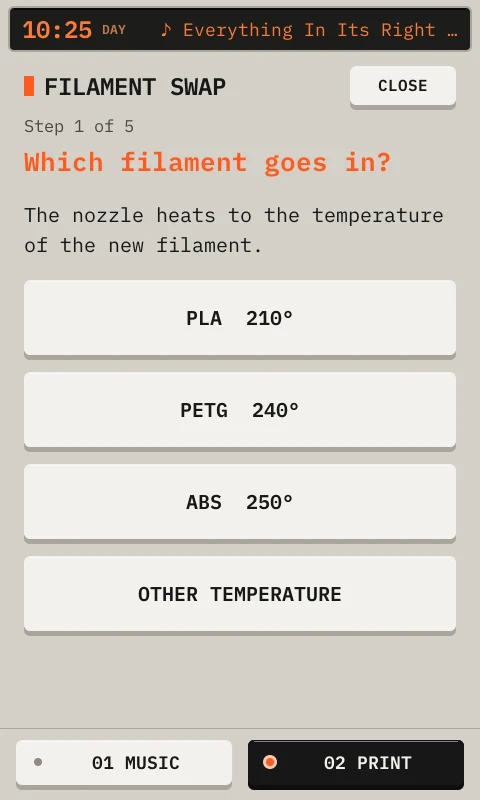
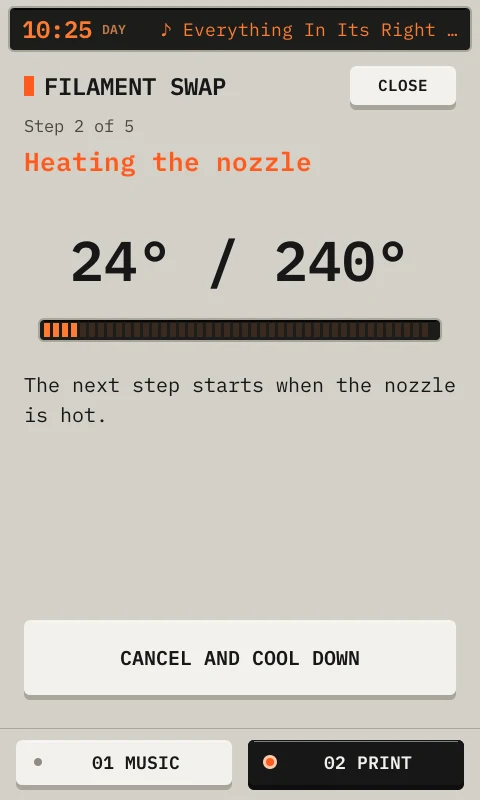
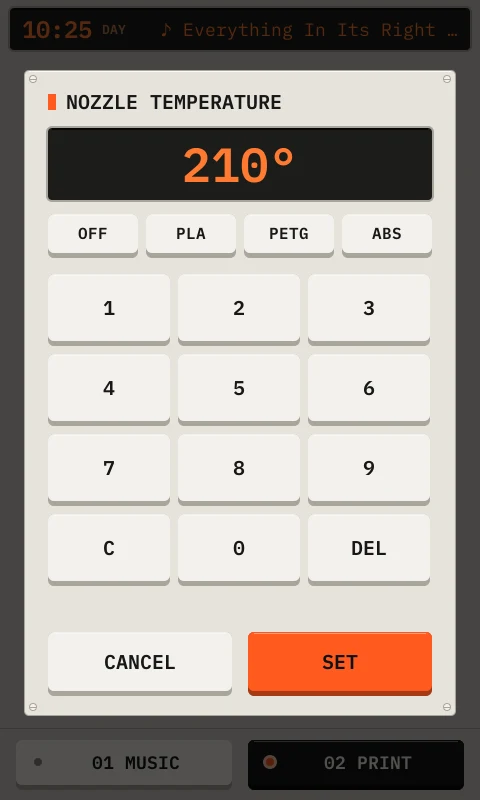
Print shows the printer state on a 20 × 2 character display, like the display on the printer, with a 3D view of the model as it prints. It can pause, resume, cancel, preheat, and start a file. Control moves the head with a joystick and leads you through a filament swap. Tune sets speed, flow, Z offset, and the fan while a print runs.
Behind the app, all on the Pi:
- go-librespot makes the Pi a Spotify Connect device named “Speakerdeck”. It plays into an ALSA loopback.
- CamillaDSP applies the equalizer and plays from the loopback to the Amp2.
- OctoPrint runs as a systemd service on port 5000.
- Klipper runs as a systemd service and drives the printer over USB. OctoPrint talks to it through the serial port that Klipper makes.
The deck app, go-librespot, and CamillaDSP run in Docker Compose. OctoPrint and Klipper run as normal services.
Music
Spotify on the screen, with your playlists and an equalizer for the speakers.
Printing
The state of the printer from heating to the end of the print, and tuning while it prints.
Printer control
Move the head, change the filament, and set temperatures by touch.
Setup and themes
Link Spotify from your phone, and switch between the day and night themes.
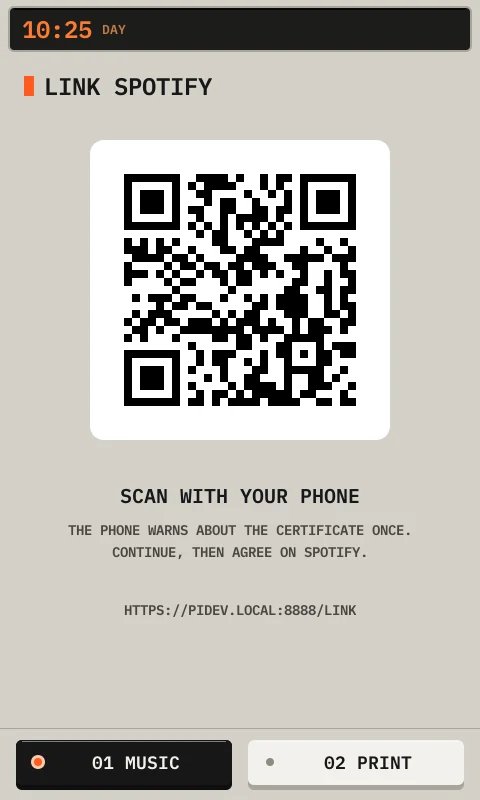
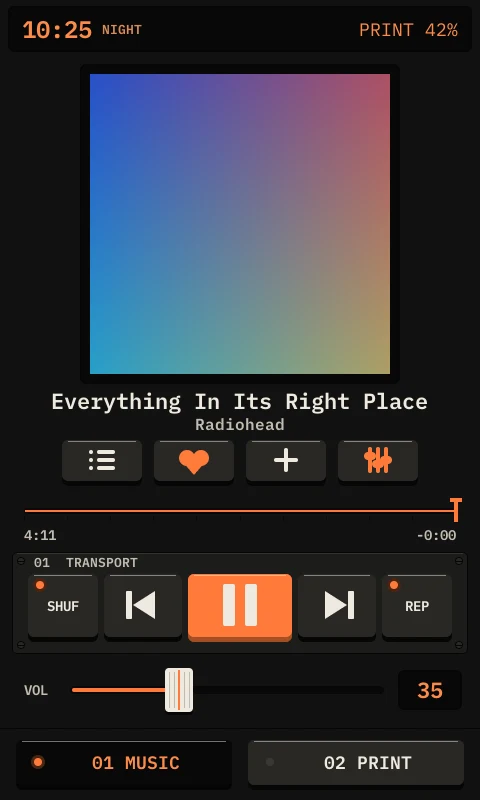
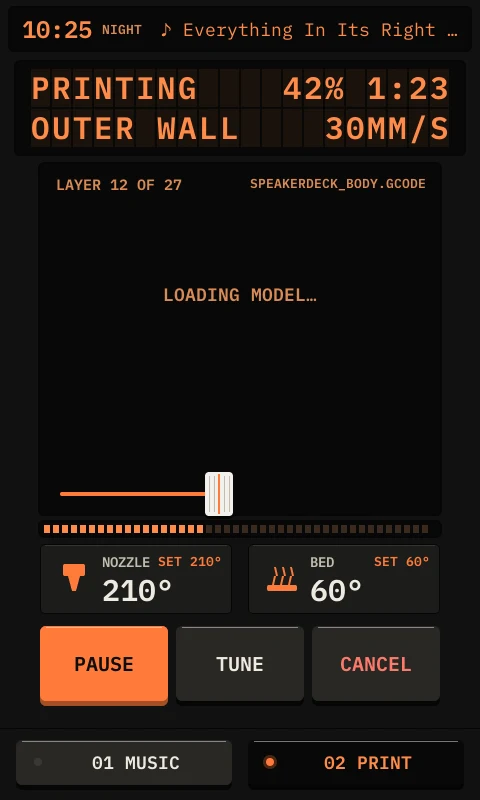
Screens from the demo mode of the deck app. In a real print, the dark area shows the model.
Set up the software
Flash Raspberry Pi OS Lite (64-bit) to the SSD and boot the Pi from it. Install Docker. Then clone the repository on the Pi and set HIFIBERRY_OVERLAY in speakerdeck.env. The Amp2 uses hifiberry-dacplus-std.
git clone https://github.com/beetlebugorg/printdeck.git && cd printdeck

# 1. Turn on I2C and the HiFiBerry overlay, then reboot
setup/10-boot-config.sh && sudo reboot

# 2. Check that the HiFiBerry card shows
aplay -l

# 3. OctoPrint as a systemd service on port 5000
setup/30-octoprint.sh

# 4. Klipper as a systemd service. Set KLIPPER_REF to the version of your printer firmware.
setup/35-klipper.sh

# 5. The deck app, go-librespot, and CamillaDSP in Docker Compose
setup/50-deck.sh
The first run of setup/50-deck.sh makes .env from .env.example. Fill in the Spotify client ID, the OctoPrint address and API key, and DISPLAY_ROTATE (90 or 270), then run the script again. It turns off the desktop and starts the Docker stack.
For the Spotify client ID, create an app in the Spotify developer dashboard and add http://127.0.0.1:8888/callback as its redirect URI. Spotify Connect needs Spotify Premium.
To link Spotify, run docker compose run --rm deck auth and follow the address it prints. Then choose “Speakerdeck” once in the Spotify app. After that, the touch screen can start the music.
To update, run git pull, then docker compose up -d --build.
Build it
Drag to turn · scroll to zoom · right-drag to pan
-
01
Print the four parts
- Install the Cura profiles: run
python3 cura/make_profiles.py --installwith Cura closed. - Load the STLs as they are. Do not turn them.
- Print the slab front face down on a smooth sheet. The screen opening is in the first layers.
- Print the chin first, and push it onto the slab to test the snap fit.
Tip If the snaps are too tight, set horizontal expansion to −0.1 mm for the chin and the back plate.
- Install the Cura profiles: run
-
02
Mount the display
- Slab
- Adafruit 7" HDMI display with touch
- M3 heat-set inserts
- M3 screws
- HDMI ribbon cable kit
- USB-A to micro USB cable, thin
- Press four 4 mm M3 inserts into the bosses in the slab. Stop when each insert is flush.
- Put the slab face down on a soft cloth.
- Connect the HDMI ribbon and the USB cable to the display.
- Set the display into the slab, glass to the front and sockets at the bottom. The cables come out of the open bottom.
- Attach the display with four M3 × 6 screws.
-
03
Attach the drive
- Lay the drive on the flat front of the back plate, adapter up.
- Attach it with four M3 × 5 screws from the rear.
- Connect the drive cable. Bend it to the rear through the notch in the top edge of the plate.
-
04
Mount the fan and the Pi
- Press four M3 inserts into the four tall bosses on the rear of the back plate.
- Set the fan between the corner guides, label side away from the plate, cable to the right.
- Screw the fan down with four M3 × 16 screws. Stop when the fan touches the boss.
- Stick the heatsink on the Pi SoC. Set the Pi + Amp2 stack on the bosses, USB ports up.
- Thread the standoffs into the inserts, then plug the fan into the Pi fan socket.
Caution The fan screws cut their own thread in plastic. Do not tighten past snug.
-
05
Slide the back plate in
- Keep the slab face down. Lead the two display cables through the notches in the bottom edge of the back plate: USB at the left, ribbon at the right.
- Set the edges of the plate into the grooves at the open bottom of the slab.
- Slide the plate up until it stops at the top wall.
Tip If the plate does not slide, check the display plugs first. The drive sits right behind them.
-
06
Snap on the chin
- Tuck the extra display cable into the chin.
- Push the chin up onto the slab until both tongues click. Its grooves capture the bottom of the back plate.
-
07
Click on the foot
- Set the case on the foot. The foot sits 6 mm in from the front and sides.
- Push down until the four hooks click into the chin floor.
-
08
Route the cables on the rear
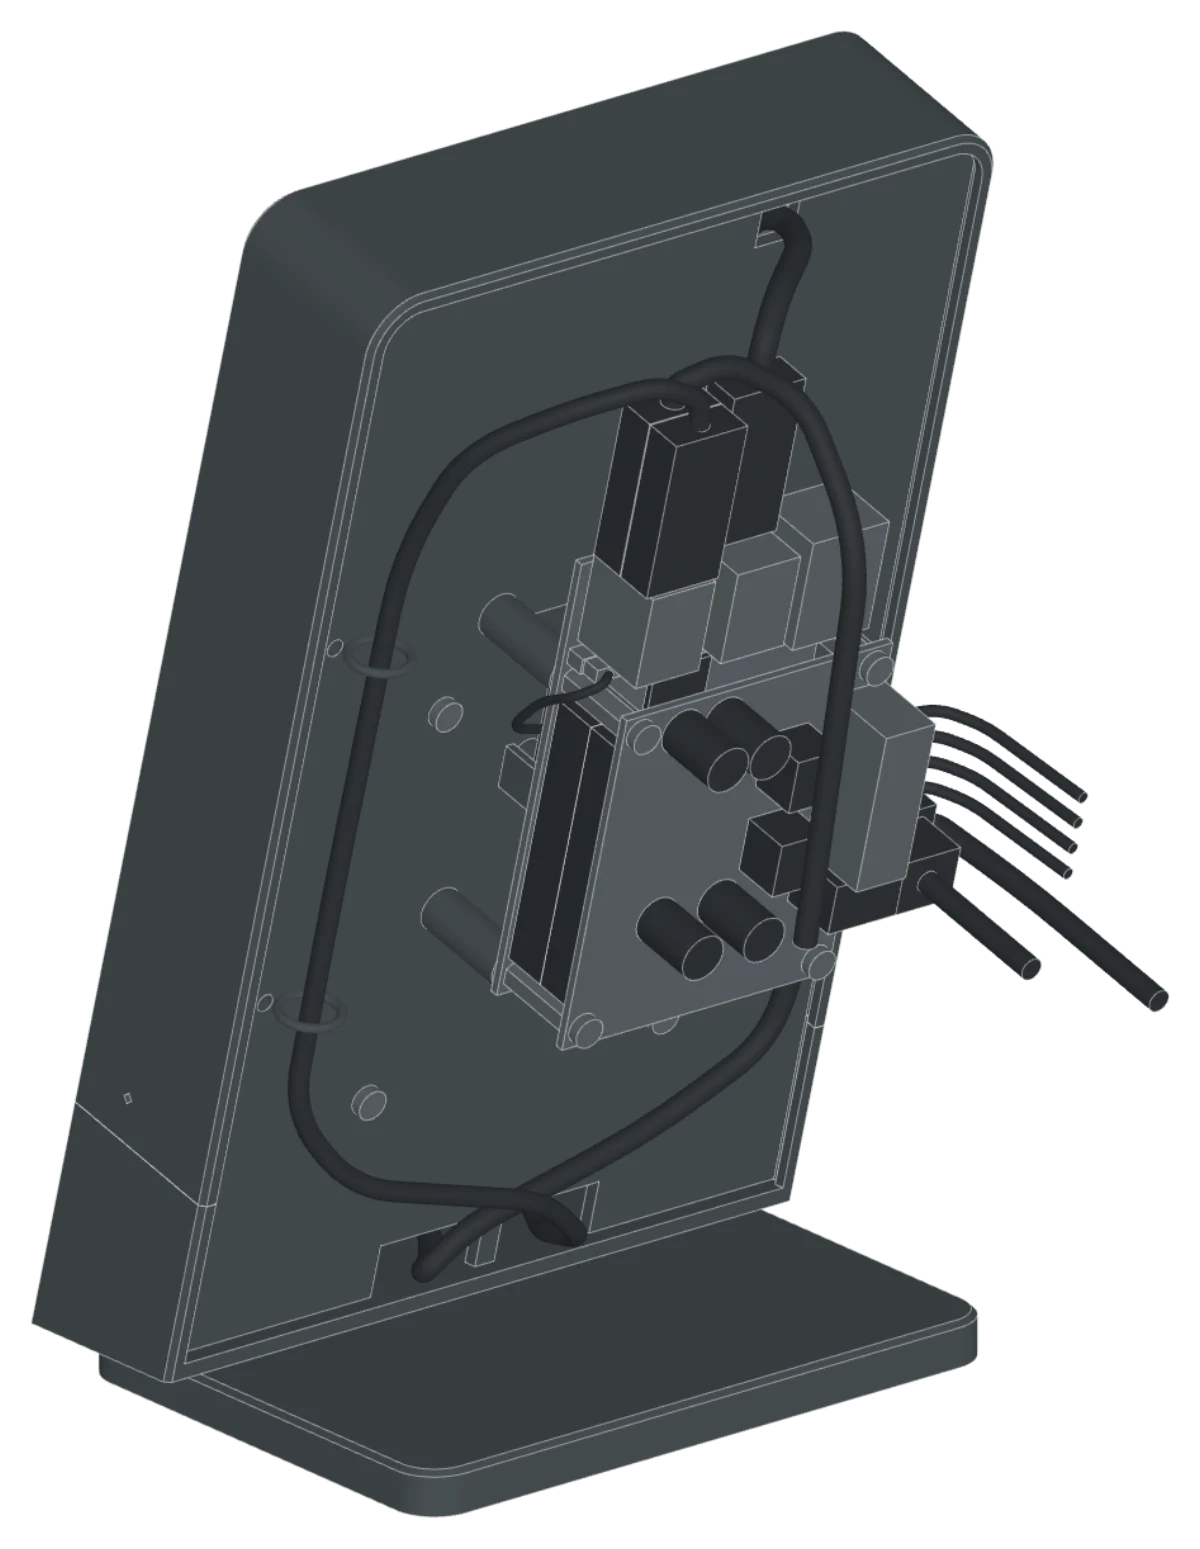
- Lead the drive cable over the top of the Pi into the blue USB 3 port next to the board.
- Run the HDMI ribbon up the left side. Tie it at the left pair of holes. Plug it into the micro HDMI port next to USB-C.
- Run the touch USB cable up the right side. Tie it at both right pairs of holes. Plug it into the black USB 2 port away from the board.
- Twist each tie closed on the rear. Keep the cables tight, with no loops.
-
09
Connect power, printer, and speakers
- Plug the USB-C supply into the left edge of the Pi. Turn the cable to the rear.
- Plug the 3D printer into the black USB 2 port next to the board, from above.
- Plug the right-angle Amp2 supply into the jack on the left edge of the Amp2.
- Wire the speakers to the screw terminals on the left edge of the Amp2.
- Power on, then follow Set up the software above.
Tip To open the case: pull the foot off, push a paper clip into the small hole in each side wall to free the chin, then slide the back plate out.