Software
Desktop app and simulator
The Printdeck for a computer, and a simulated printer in 3D.
desktop/ is the Printdeck for a computer: a Qt 6 window around printdeck app. It runs the Klipper host and the deck UI for a printer on USB. Cura finds it as it finds a Printdeck. Ctrl+K (Cmd+K on a Mac) opens the camera of the deck.
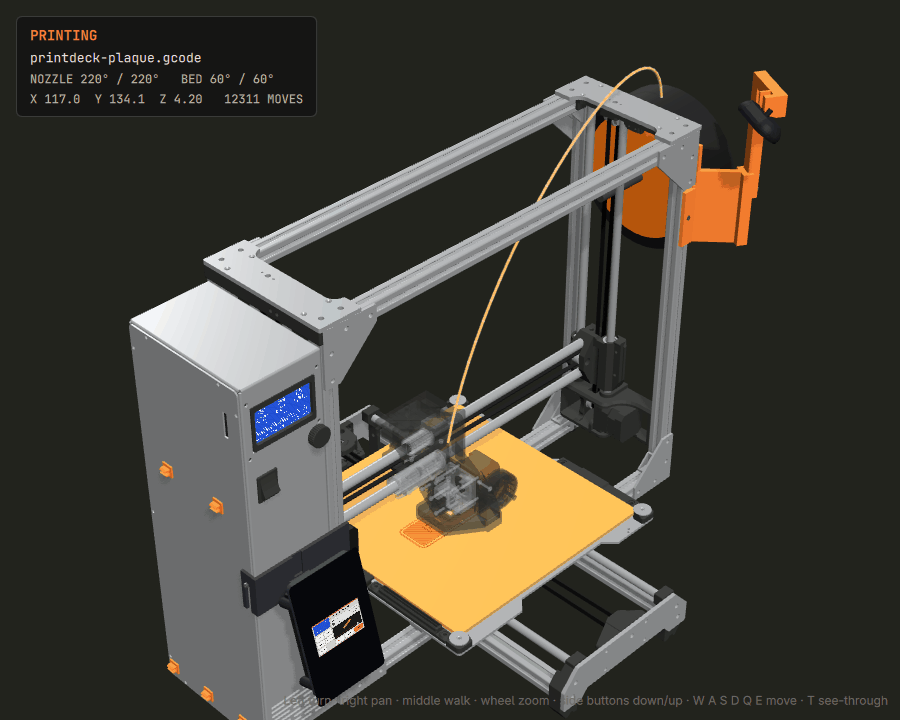
printdeck app -sim runs the deck with a simulated TAZ Workhorse. The Simulated printer page of the deck changes it to a Mini 2. A second window shows the printer in 3D:
- The axes and the belts move with the steps of the simulated board.
- The pod is on the printer, and its screen shows the deck UI.
- The left button turns the view, the right button pans it, and the wheel zooms. T makes the tool head see-through.
To build it, you need Go, CMake, Ninja, and Qt 6.5 or later with Qt Quick 3D:
B=~/.cache/printdeck/desktop
(cd deck && go build -o $B/printdeck ./cmd/printdeck)
cmake -S desktop -B $B -G Ninja -DCMAKE_BUILD_TYPE=Release
ninja -C $B
$B/Printdeck -sim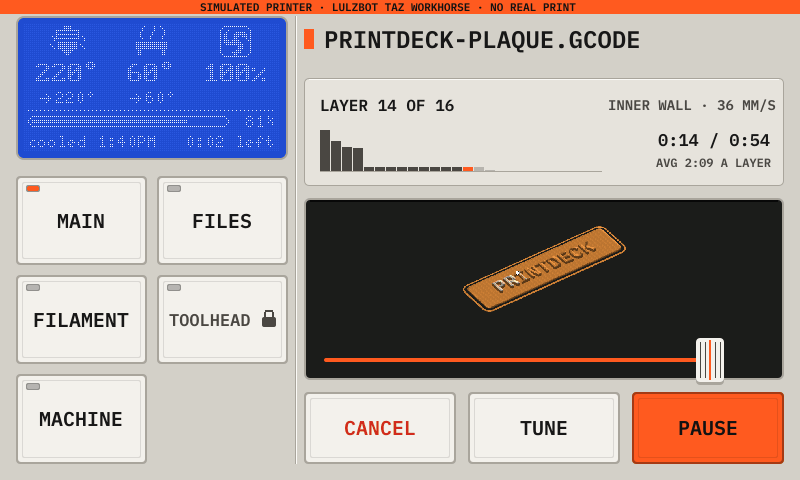
printdeck app
The window starts printdeck app and shows its remote screen. The app serves the screen and the API for slicers on 127.0.0.1:7351. Its flags, from deck/cmd/printdeck/app.go:
| Flag | Default | What it does |
|---|---|---|
-dir | the folder of the app (default: the configuration folder of the user) | |
-addr | 127.0.0.1:7351 | the address of the web server |
-parent | off | end when the input closes (the window of the app started the program) |
-sim | off | a simulated printer: the TAZ Workhorse on the simulated board, in its own folder |
The folder of the app has gcodes/, models/, klipper/printer.cfg, logs/klippy.log and the API socket klippy.sock. In a new folder, put the configuration of your printer above the include line of printer.cfg. With -sim, a new folder gets the simulated TAZ Workhorse.
The window
The window program (desktop/) reads these environment variables:
| Variable | What it does |
|---|---|
PRINTDECK | The path of the printdeck program. Without it, the window starts the program next to the window program. |
PRINTDECK_ATTACH | A file with the first line of the output of a printdeck app that runs already. The window connects to that app and starts no app. |
PRINTDECK_FILM | With -sim: the 3D window shows the film of desktop/film/, and records it to this file when the file with .go added exists. |
PRINTDECK_CAMERA | 1 opens the Camera window at the start. Ctrl+K opens and closes it. |
PRINTDECK_TEST_CAMERA | Any value: printdeck app gets a test camera with a moving picture (960 x 540, 10 frames a second). 2: two test cameras of one model. |
PRINTDECK_SHOT | A PNG file: the window writes a picture of the windows after PRINTDECK_SHOT_SECONDS (8), and ends. With PRINTDECK_SHOT_FRAMES=N and -sim, it first writes N pictures of the 3D window, 10 a second. An open Camera window goes to the file with -camera before .png. |
The deck UI in the window is drawn by the QML files of the Cura plugin (slicer/cura-plugin/Printdeck/qml), so the two stay the same.
The meshes of the 3D window
The TAZ Workhorse meshes come from the CAD of the LulzBot TAZ Workhorse ("Redgum"): https://gitlab.com/lulzbot3d/printers/redgum
The LulzBot Mini 2 meshes (mini2_*.bin) come from the CAD of the LulzBot Mini 2 (hibiscus_assembled.fcstd), with its stock LCD.
The CAD is by LulzBot. It has the licenses "GPLv3 or later and/or CC BY-SA 4.0". These meshes have the same licenses.
cad/export.py makes the TAZ Workhorse meshes from the FreeCAD files of the CAD. The file has the steps.
The pod_*.bin meshes are the Printdeck pod of this repository (lulzbot/pod.py): the 5 inch Touch Display 2 with the Pi 5 on its back, in its printed case. The taz_*.bin meshes are its bracket, the rail clips and the cable clips on the TAZ Workhorse. The Mini 2 has its bracket and clips in mini2_*.bin. cad/deck.py makes these meshes and the Mini 2 meshes, and deck.json lists them. The file has the command. The pod meshes have the license of this repository.