The deck UI · tall
Set up
01Connect to Wi-Fi
- Switch on the Printdeck. The setup opens.
- Tap your Wi-Fi network, then type its password.
- Wait until the deck is connected, then tap Next.
- Write down the address and the password, then tap Finish.
The setup: step 1
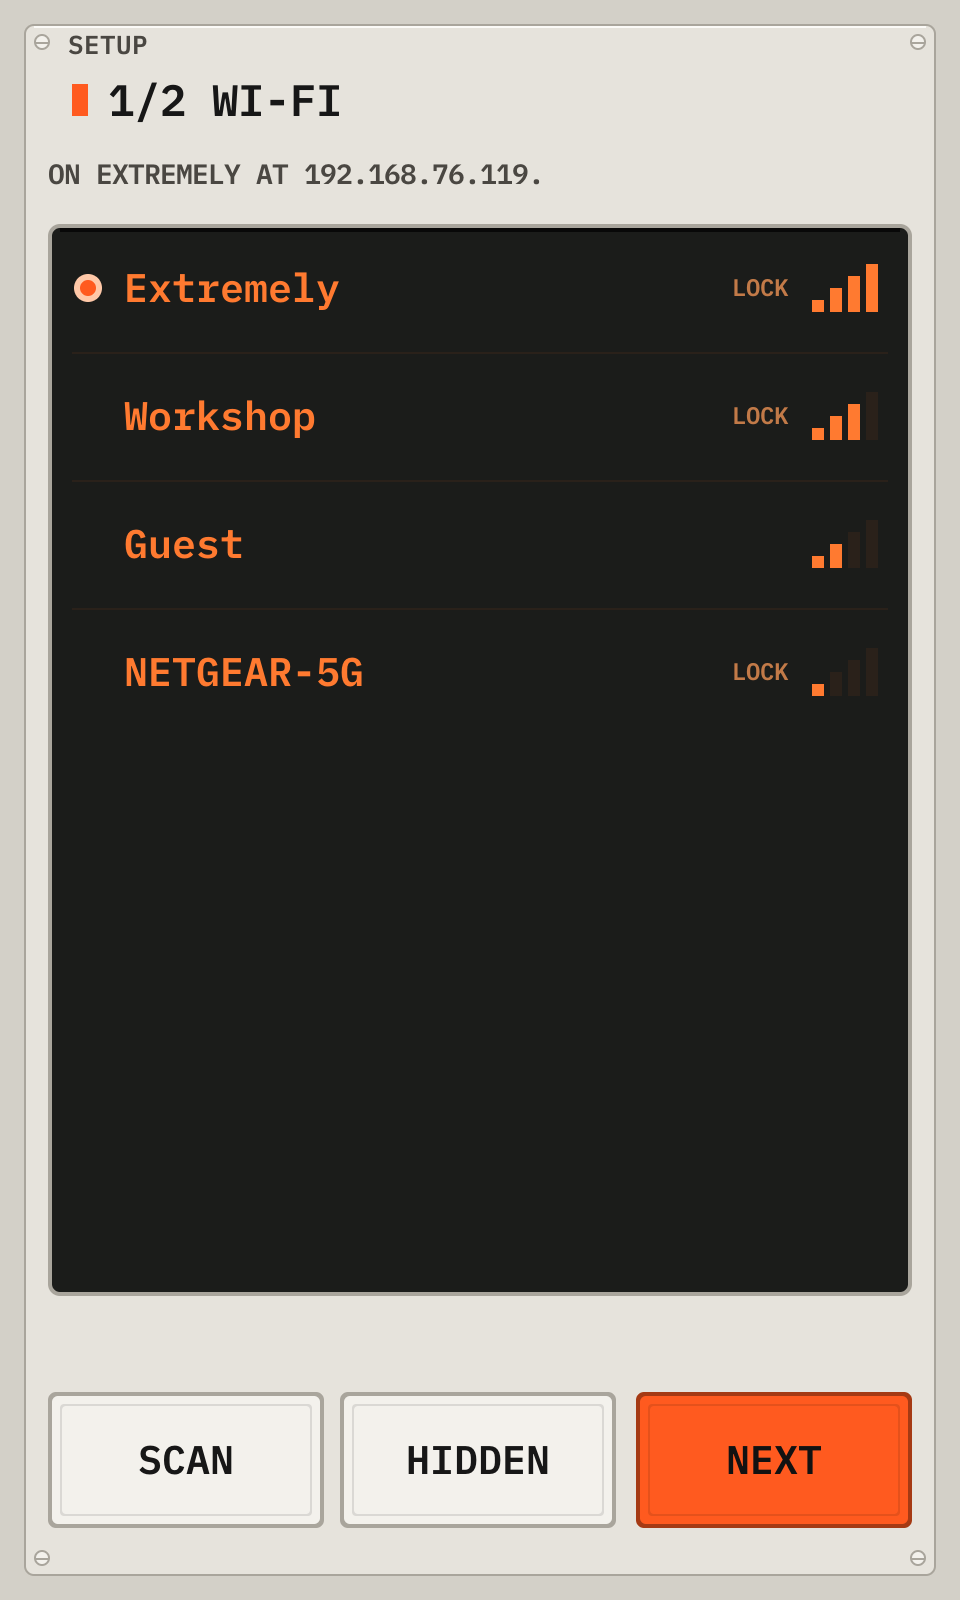
- 1NetworksTap your network, then type its password.
- 2ScanScans for the networks again.
- 3HiddenFor a hidden network: type its name and its password.
- 4NextGoes to the summary when the deck is connected.
The setup: step 2
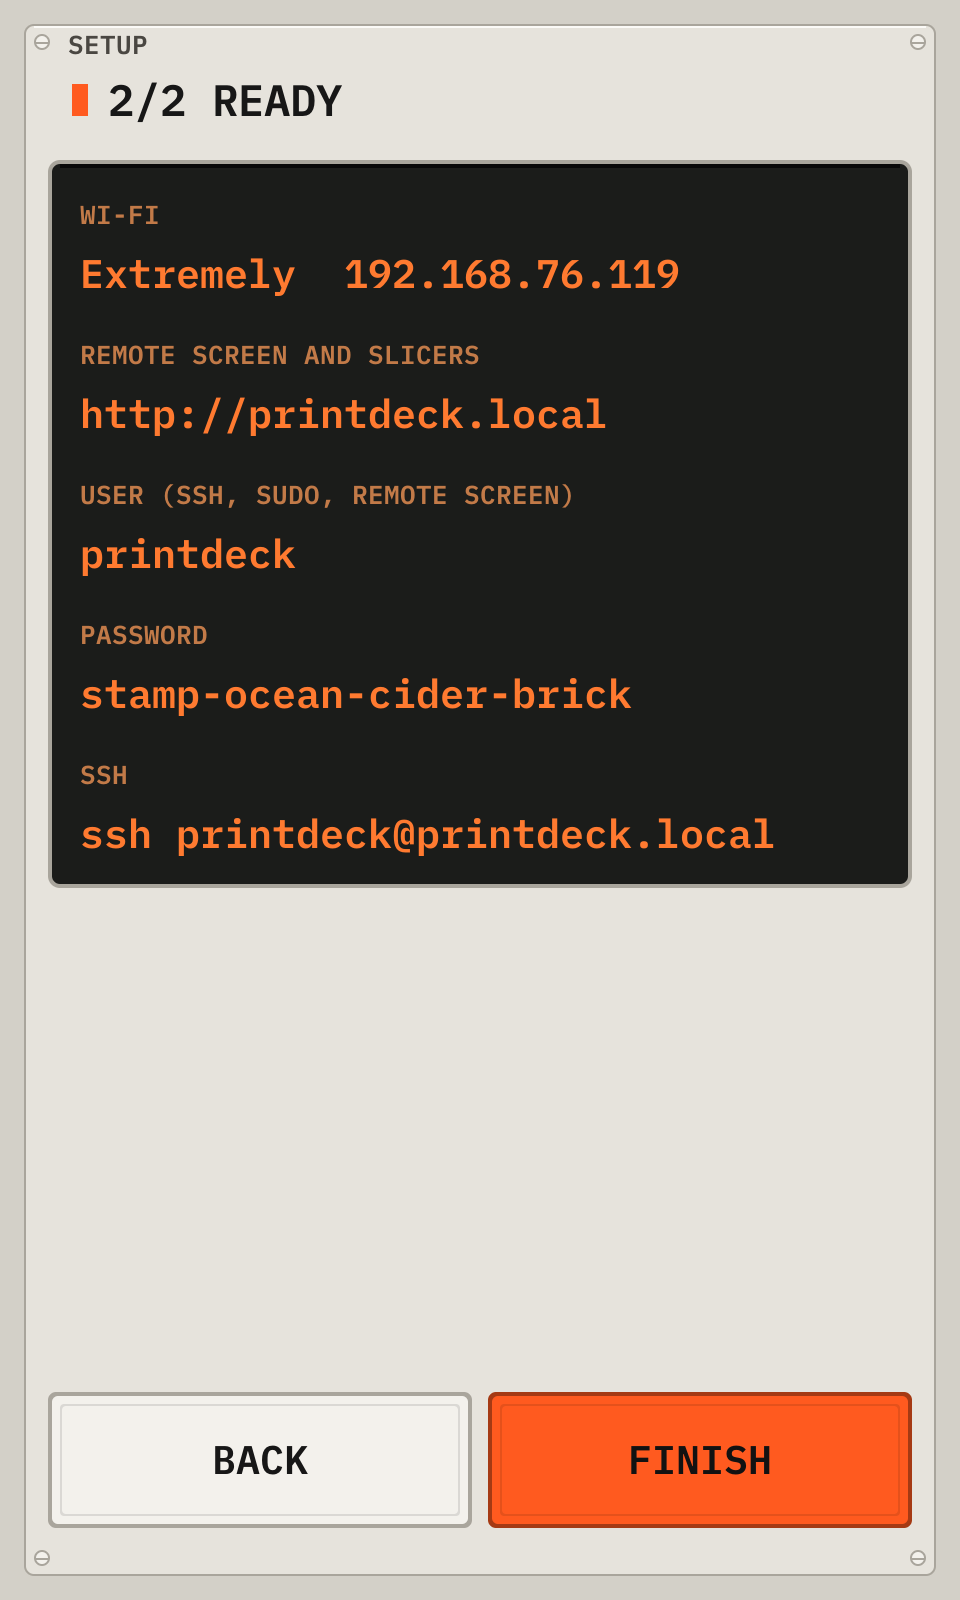
- 1AddressThe address of the deck. Open it in a browser.
- 2PasswordThe password of the web pages. Machine > Wi-Fi and help shows it again.
- 3FinishCloses the setup. The setup shows only at the first start.
To set the Wi-Fi before the first start, put the SD card in a computer. Fill in printdeck.txt on the PRINTDECK partition.
02Choose your printer
A new Printdeck has no printer config, so it shows the printer setup.
- Connect the printer to the Printdeck with a USB cable, and switch the printer on.
- Wait until the deck finds the board. If the board is missing, tap Search again.
- Tap Choose printer. The printers of the brand of your board are at the top.
- Tap your printer, then Use. Klipper restarts with its config.
No printer yet
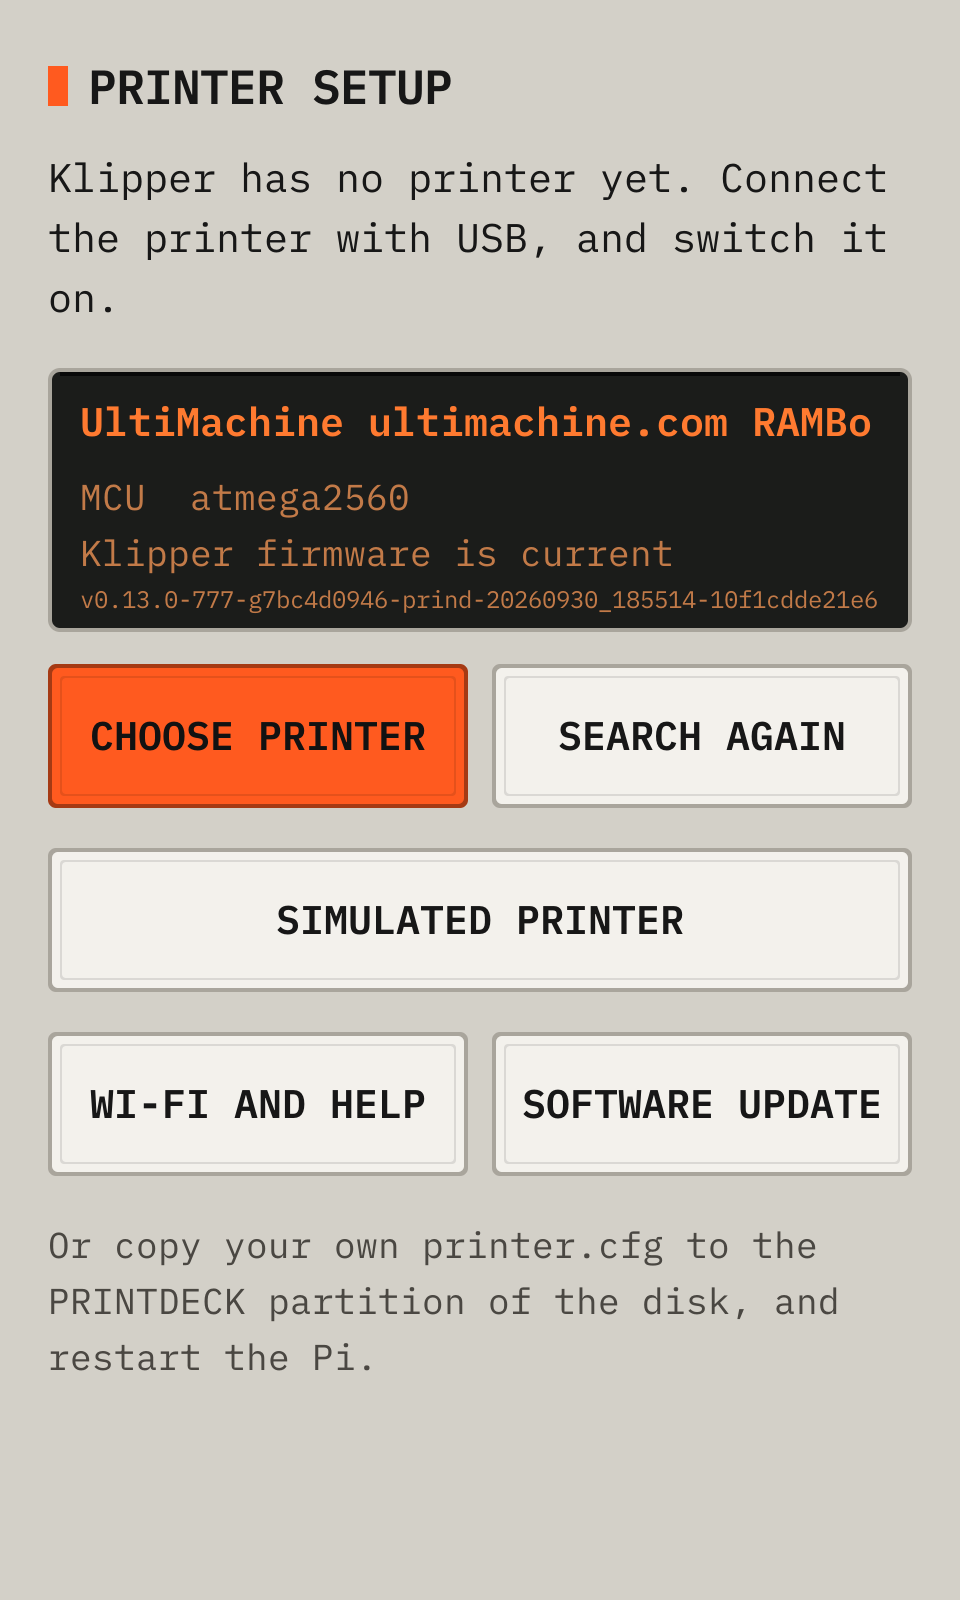
- 1BoardThe board on USB and its firmware.
- 2Choose printerOpens the list of Klipper example configs.
- 3Search againLooks for the board again.
- 4Simulated printerRuns a simulated printer, with no real printer.
- 5Your own configOr copy your printer.cfg to the PRINTDECK partition, and restart.
- 6Wi-Fi and helpThe network, the address and the password.
- 7Software updateInstalls a new version. It can fix the problem.
Choose your printer
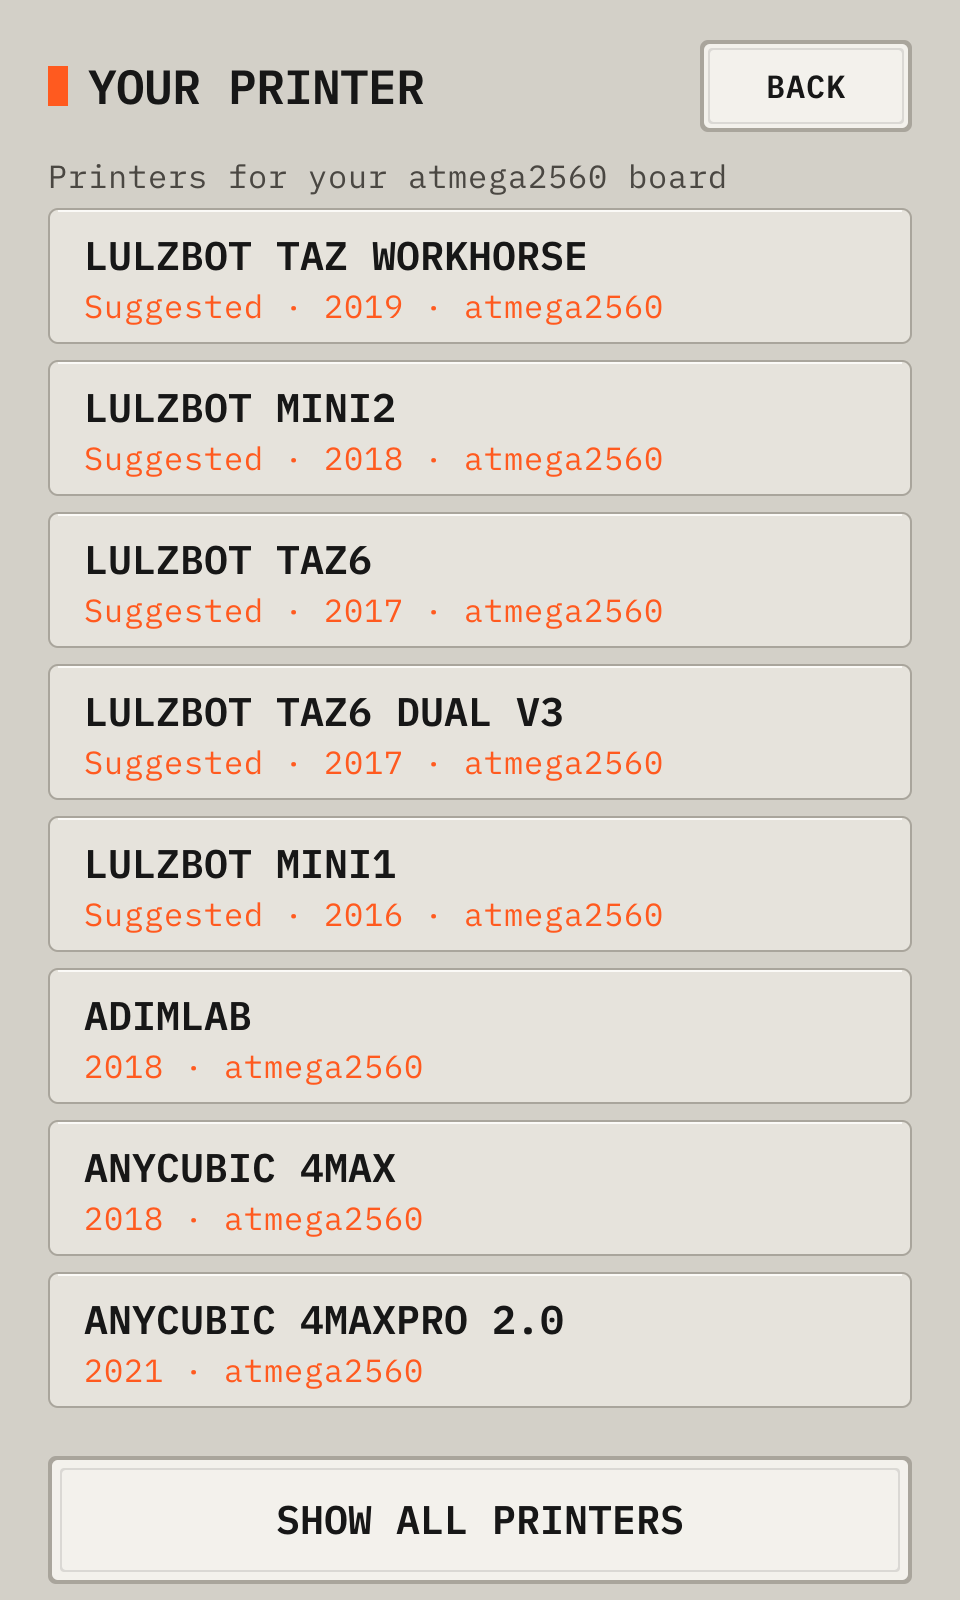
- 1ChipThe printers with the chip of your board.
- 2PrinterTap your printer. The deck writes printer.cfg and restarts Klipper. The old file stays as printer.cfg.bak.
- 3Show all printersShows the printers for all chips.
03Install the Klipper firmware
The printer board must run the Klipper firmware of this Printdeck.
- Open Machine, then Maintenance, then tap Firmware. A new board shows Install Klipper firmware on the setup screen.
- Tap Write. Keep the printer on until the deck shows the result.
- Tap OK. Klipper restarts and connects to the board.
The firmware flash
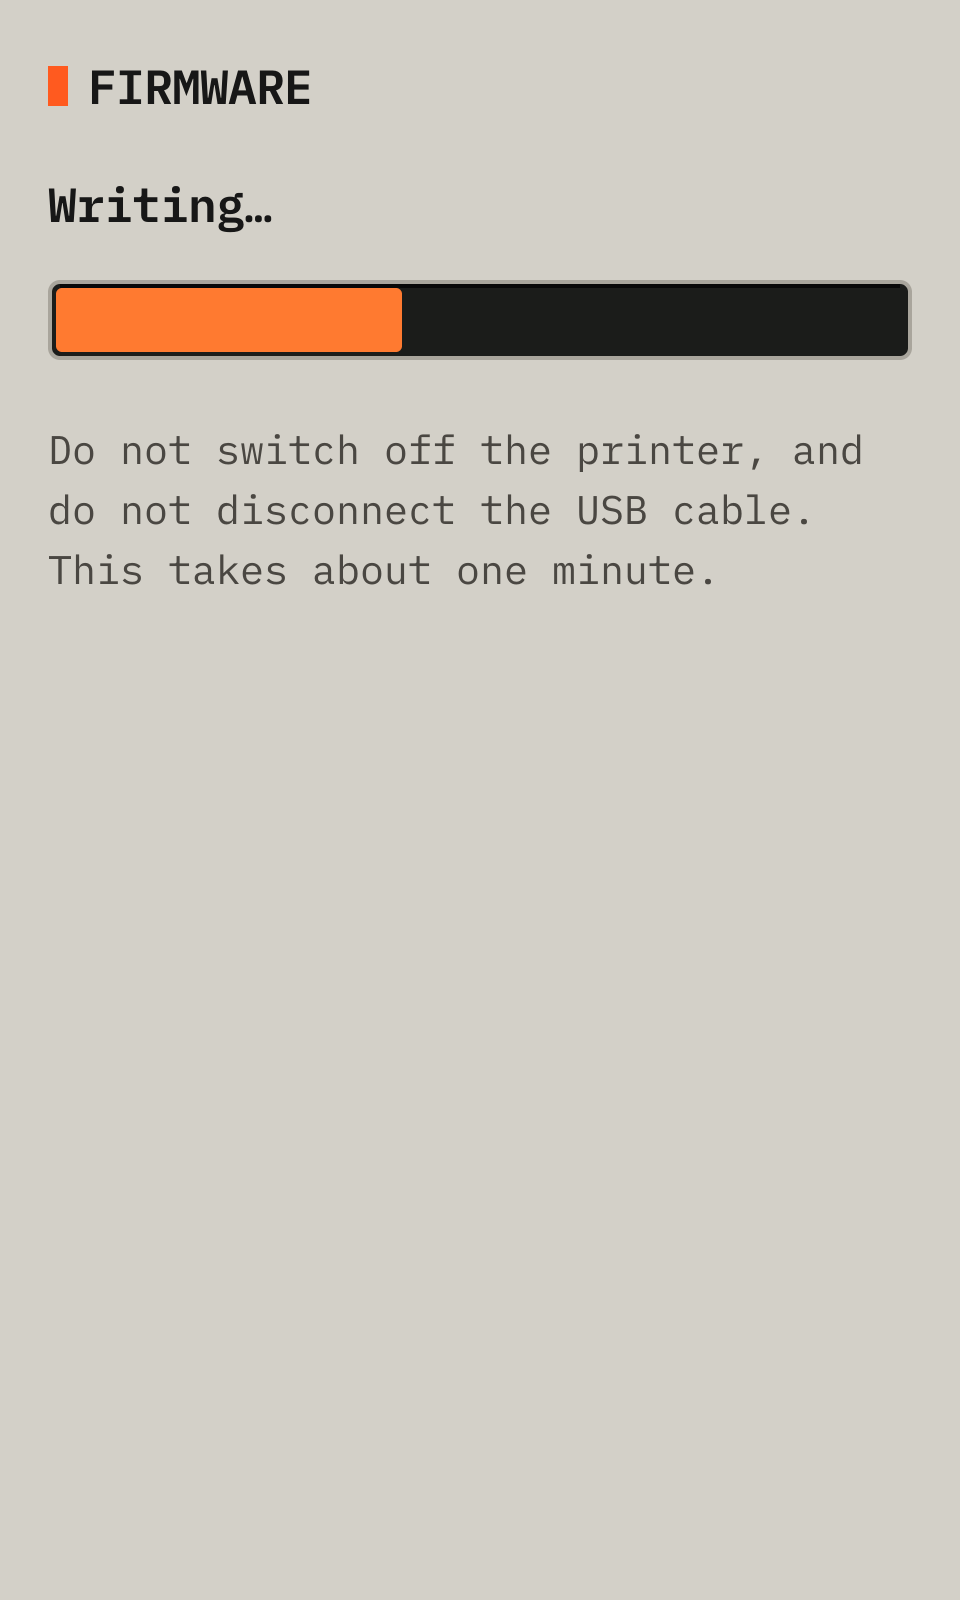
- 1StepStarting the bootloader, Writing, then Checking.
- 2ProgressThe part of the firmware that is done.
The deck stops Klipper, writes the firmware, checks it, and starts Klipper again. Printdeck flashes atmega2560 boards with an STK500v2 bootloader, for example RAMBo and RAMPS.
From the manual for a tall display. The deck draws every picture.