The deck UI · wide
Level and calibrate
16Level and calibrate
Maintenance lists the calibrations of your printer. Open it from Machine.
- Open Machine, then Maintenance.
- Tap Bed tilt or Bed mesh to probe the bed. The deck shows the action until it ends.
- Tap Probe Z offset for the paper test. Move the nozzle down until a sheet of paper drags a little, then tap Accept.
- Tap PID tune after you change a heater or a fan. A PID tune runs for about 10 minutes.
- Tap Save config to write the results. Klipper restarts.
- Open Machine, then Calibration. Tap Pressure advance, then Print the tower. After the print, tap Pressure advance, then From the tower, and type the height of the sharpest corners.
- Tap Retraction, then Print the tower. After the print, tap Retraction, then From the tower, and type the height of the lowest band with no strings.
The Maintenance page
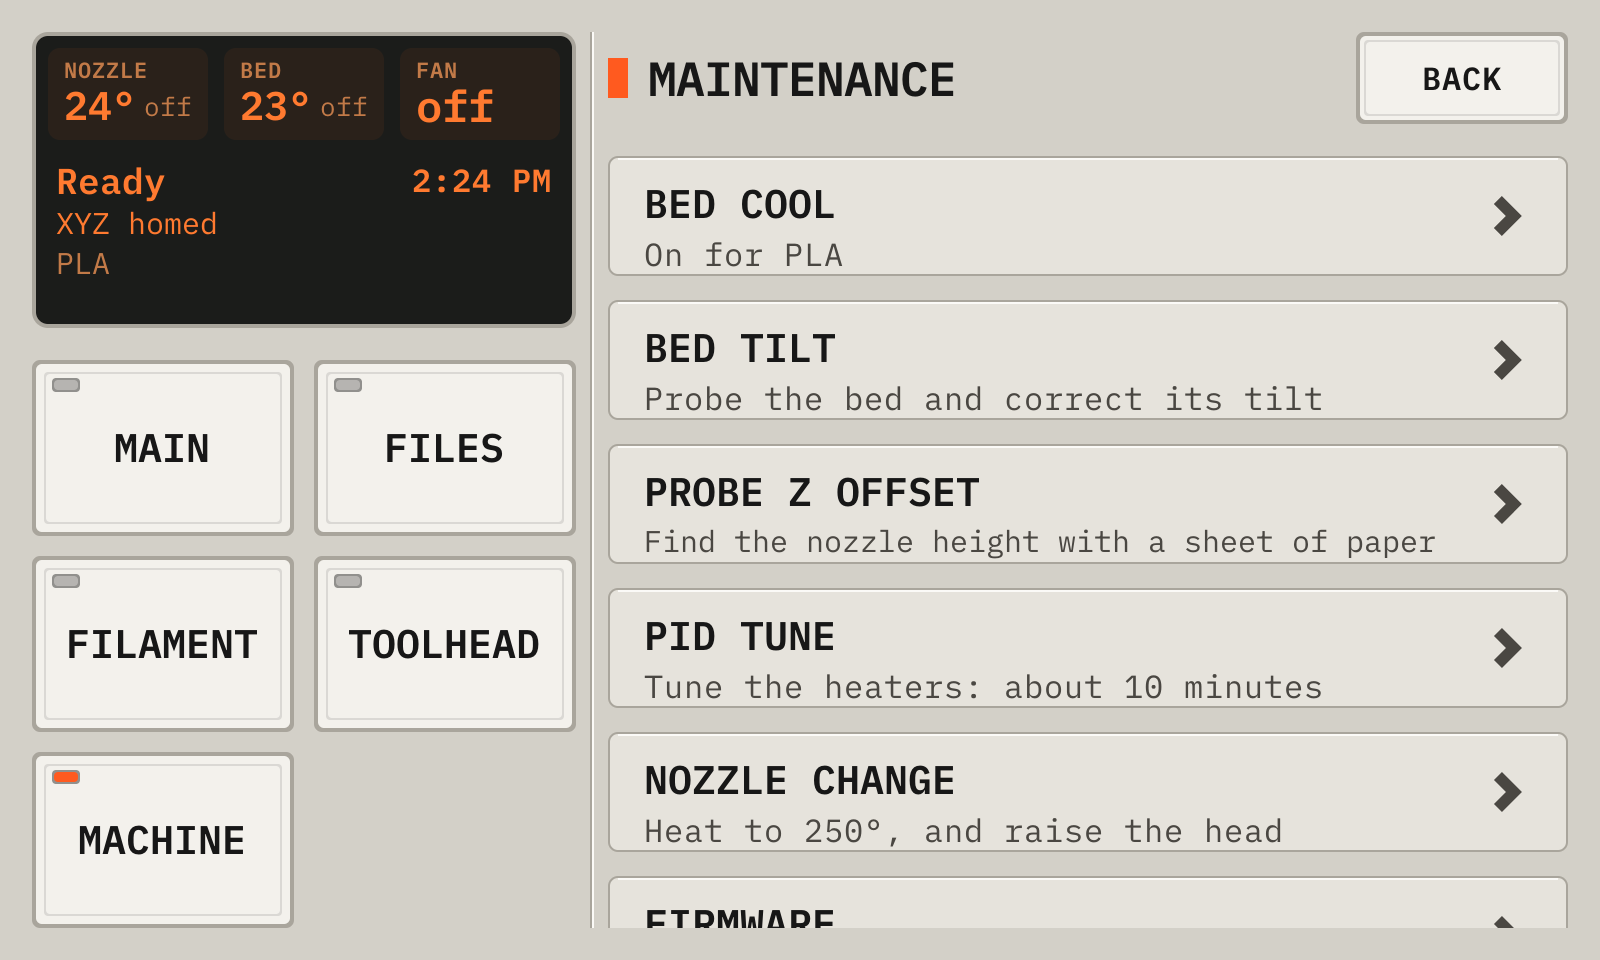
- 1Bed tiltProbes the bed and corrects its tilt. A printer with a bed mesh shows Bed mesh.
- 2Probe Z offsetThe paper test for the nozzle height.
- 3PID tuneHeats the nozzle to 210° and the bed to 60°, and tunes each heater.
- 4Nozzle changeHeats the nozzle to 250° and raises the head.
- 5FirmwareWrites the Klipper firmware. Orange text shows old firmware.
- 6Save configWrites the results into printer.cfg. Klipper restarts. Orange text shows unsaved results.
The Maintenance page, further down
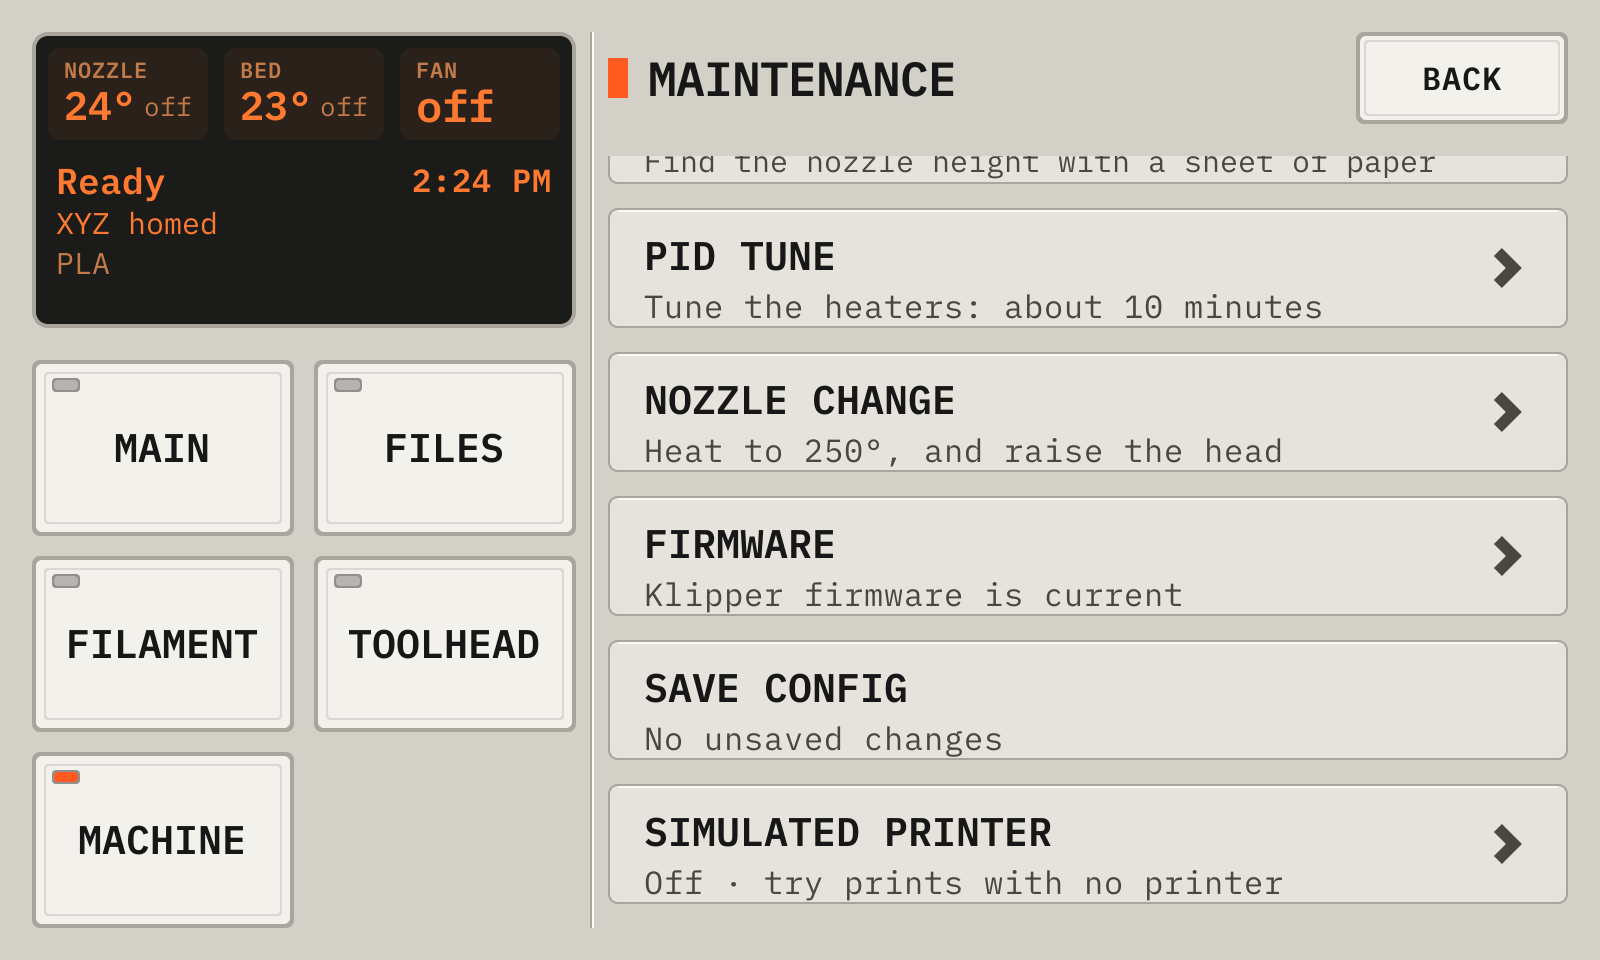
- 1Simulated printerRuns a simulated printer. Orange text shows a simulated printer in use.
The Calibration page
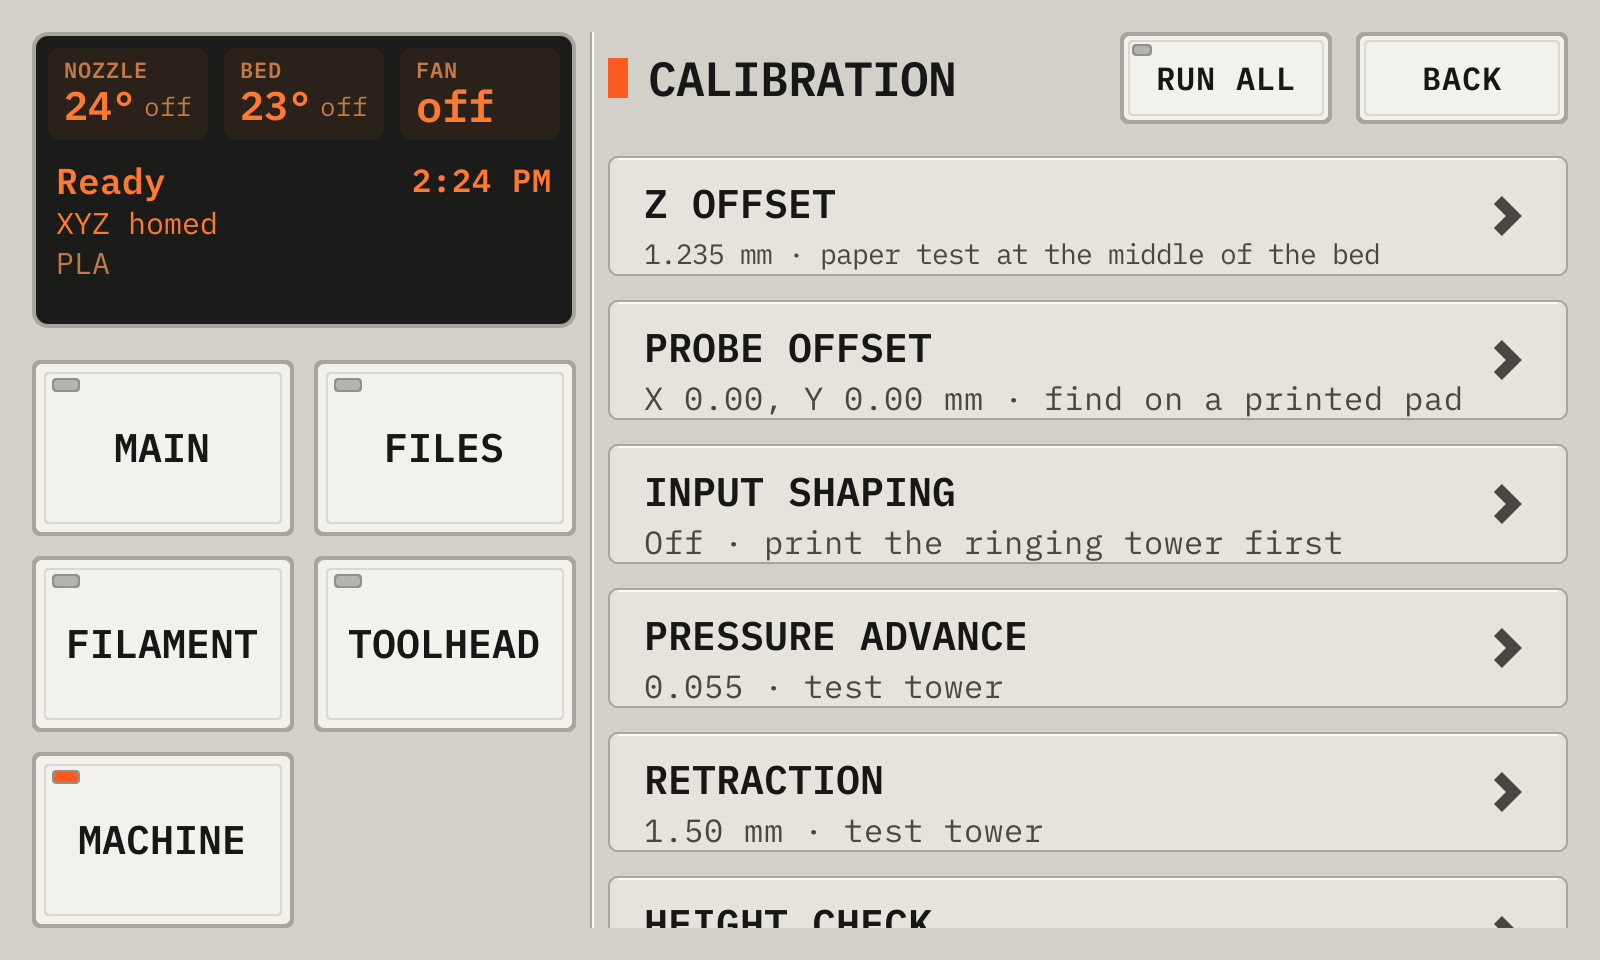
- 1Run allHeats, then runs the Z offset, the twist and the bed map, one after the other.
- 2Z offsetThe paper test for the nozzle height, hot.
- 3Input shapingOpens the tests of the input shaper: the ringing tower and the check tower.
- 4Pressure advancePrints the test tower, or sets the value from it. The pressure advance goes up 0.005 for each mm of the tower. Type the height of the sharpest corners.
- 5RetractionPrints the test tower, or sets the length from it or by hand. The length goes up 0.25 mm each 3 mm band. Type the height of the lowest band with no strings.
Each row opens its choices. A printer with no probe shows only Pressure advance and Retraction.
The retraction is the length of [firmware_retraction]. Turn on Firmware Retraction in the printer settings of the slicer, so the G-code has G10 and G11.
An action runs
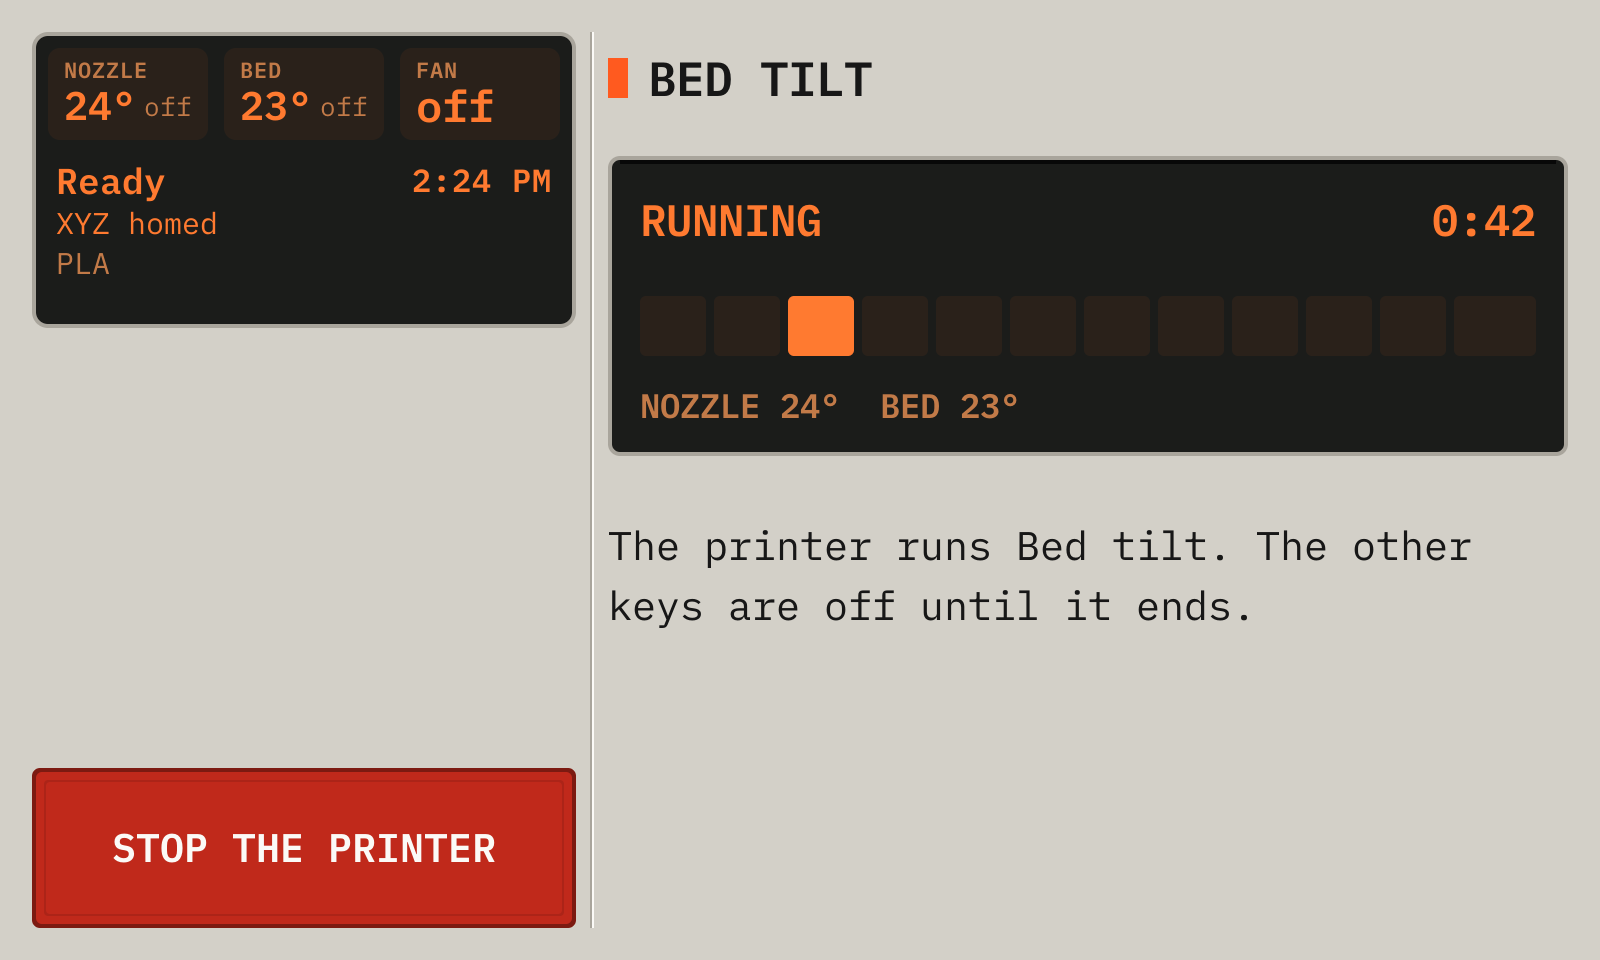
- 1ActionThe time since the start.
- 2Stop the printerStops the printer at once. Then tap Firmware restart.
The other keys are locked while an action runs. If the action fails, the deck shows the Klipper error until you tap OK.
The paper test
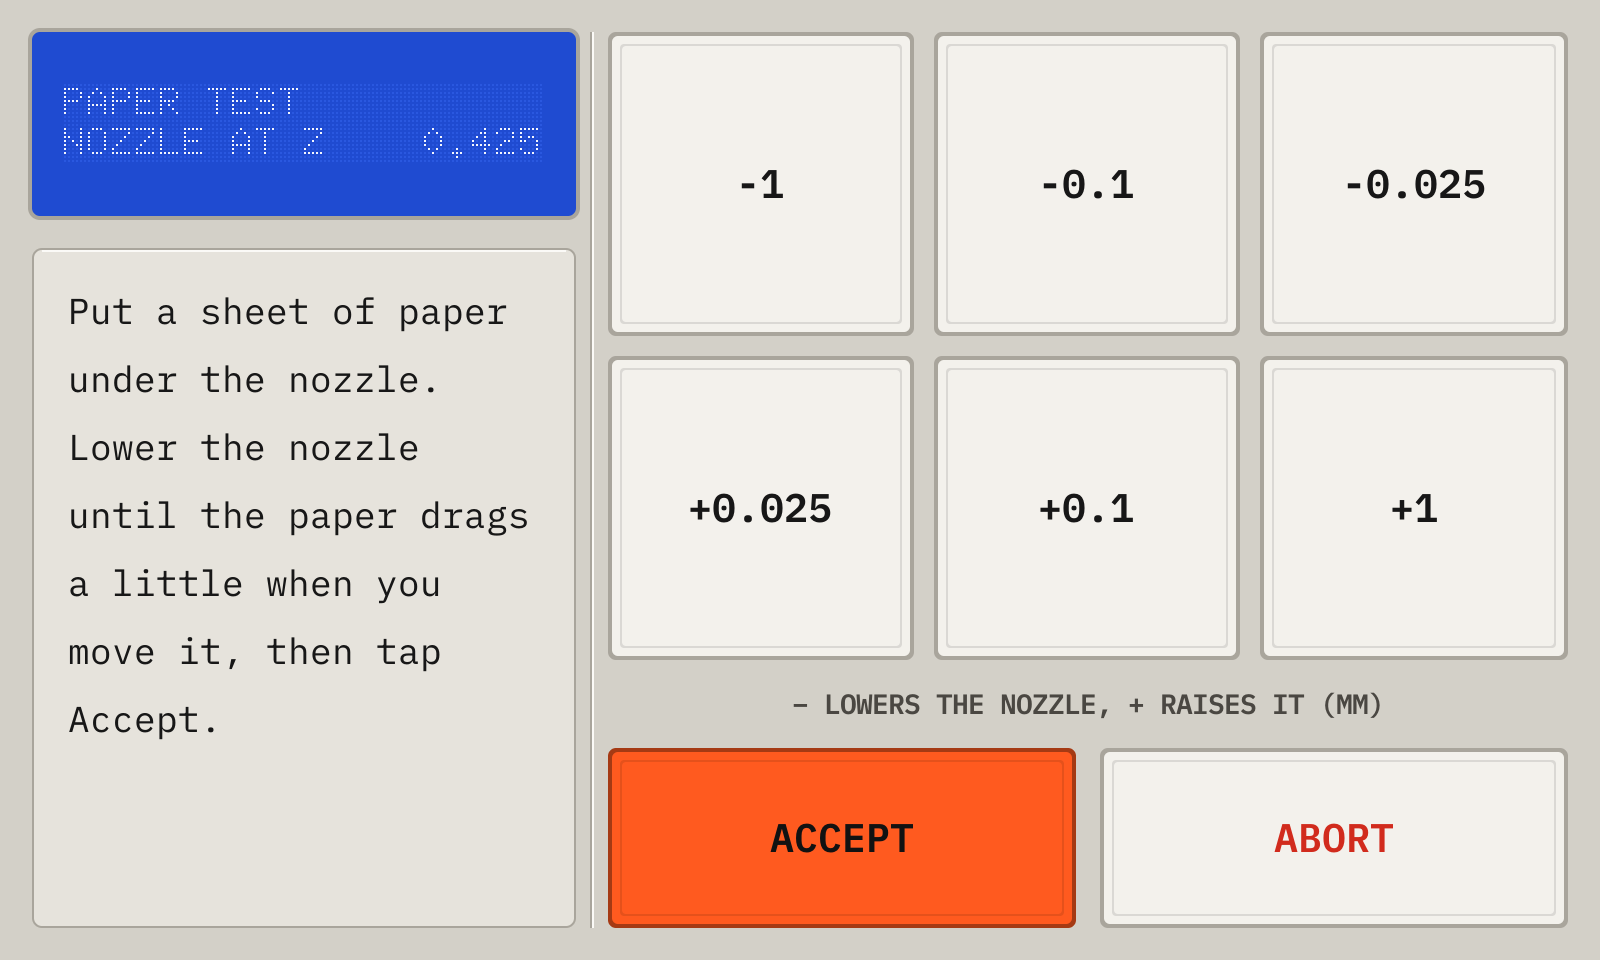
- 1HeightThe height of the nozzle now.
- 2StepsMoves the nozzle down (−) or up (+).
- 3AcceptKeeps the height. Then tap Save config.
- 4AbortStops the test with no change.
This screen opens by itself for each paper test, also from a macro.
17Calibrate the camera
A calibration lets the camera views and the time lapse crop follow the part.
The deck prints 5 towers and you tap them on a picture. A bed that moves front to back goes to two places, so the deck also gets the depth.
- Open Settings, then Camera, then Calibrate.
- Tap With a print. Clear the bed, then tap Print. The towers print in the loaded material.
- After the print, leave the towers on the bed and tap Go on. The toolhead moves to the left side, and the bed moves.
- For each mark, tap the bottom or the top of the tower, then tap Use mark. Tap Skip for a mark that you cannot see.
- The bed moves to the front. Tap the top of each tower again.
- Check that the green lines are on the towers, then tap Save. Remove the towers.
Calibrate the camera: the two ways
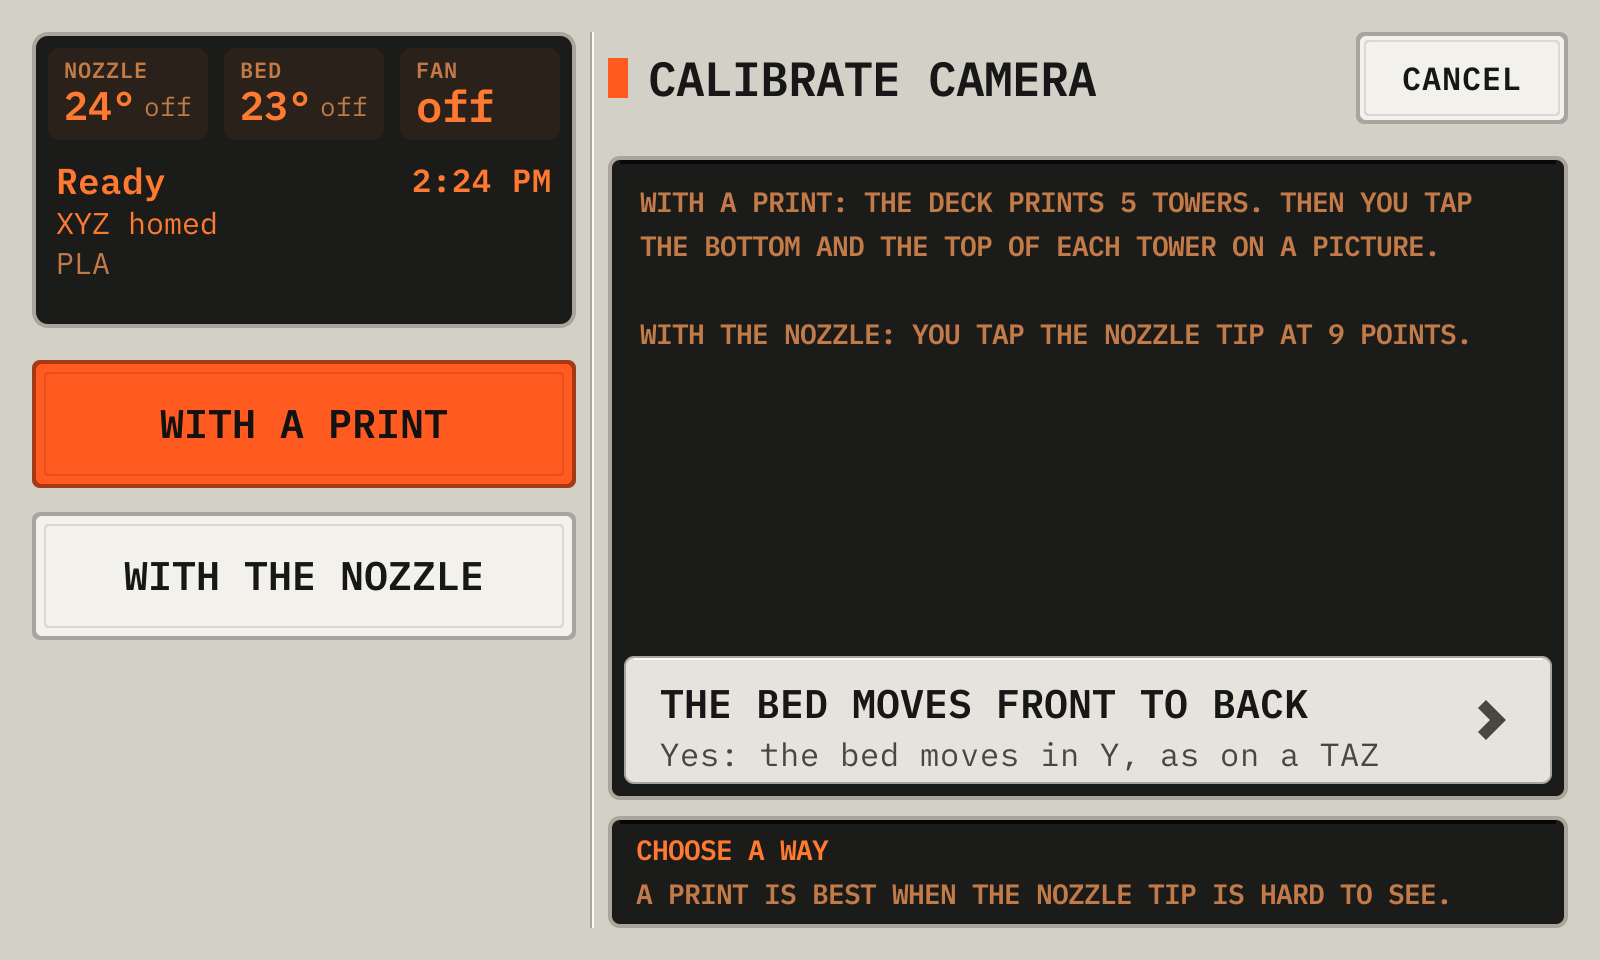
- 1With a printPrints 5 towers. Use it when the nozzle tip is hard to see.
- 2With the nozzleThe nozzle goes to 9 points. Tap the tip at each point.
- 3The bed moves front to backYes for a printer with the bed on Y, such as a TAZ. The default comes from printer.cfg.
Tap a tower
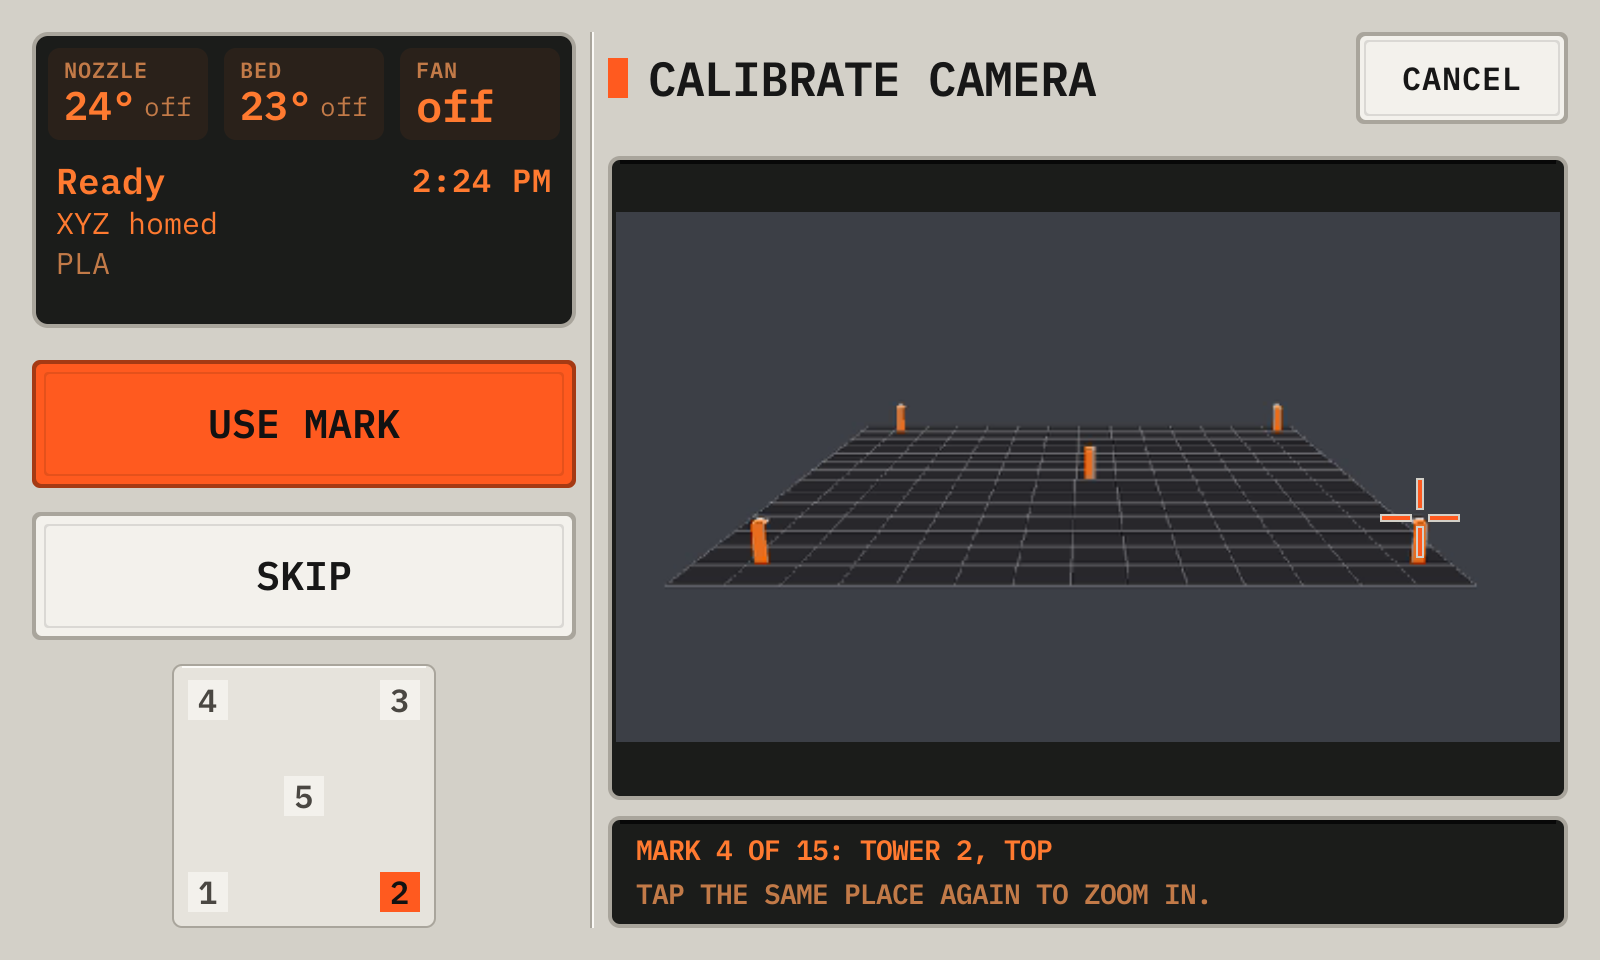
- 1PictureTap the mark. The first tap zooms in. Tap or drag again to put the mark exactly.
- 2StepThe tower and the end to tap: the bottom or the top.
- 3PlanThe towers from the top. The tower now is orange.
- 4SkipGoes to the next mark, when the picture does not show this one.
The result of the calibration
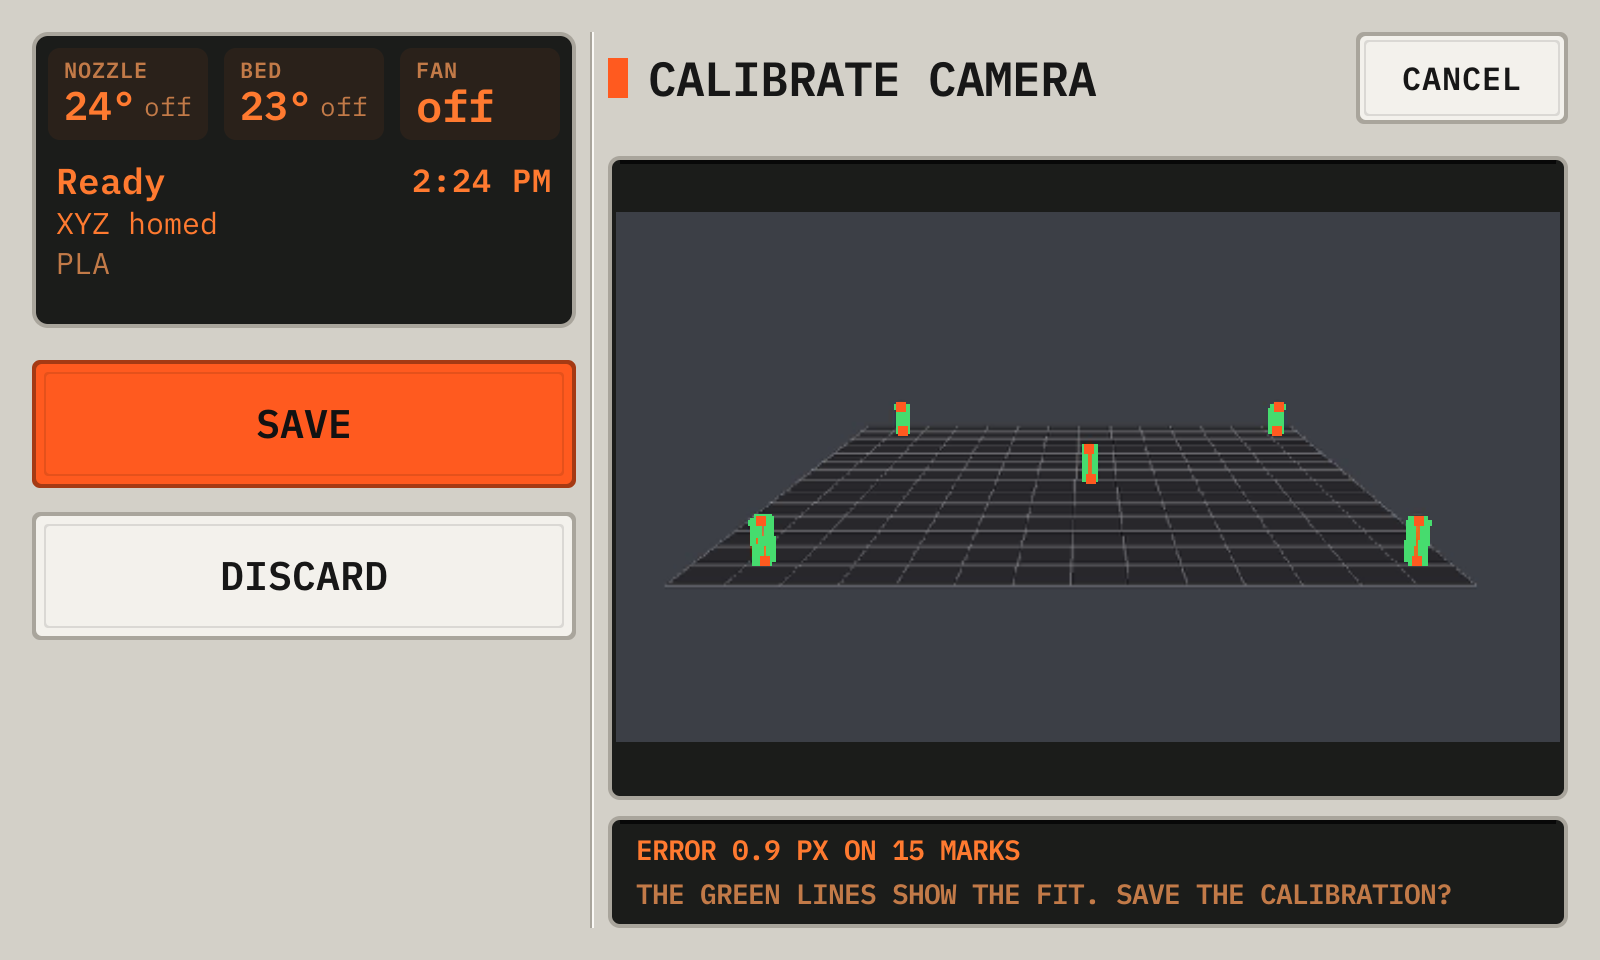
- 1PictureThe green lines are the towers of the calibration. They must be on the towers.
- 2SaveKeeps the calibration. Then remove the towers from the bed.
With the nozzle, the nozzle goes to 9 points and you tap the tip. Use it when the camera shows the tip.
Calibrate again after you move the camera or change the size of its picture.
From the manual for a wide display. The deck draws every picture.